Table of Contents
- Why a Home Inspection Checklist Matters in 2026
- How Long Does a Home Inspection Take? What to Expect
- The Exterior: Grounds, Grading, and Drainage
- The Core: Foundation, Structure, and Load-Bearing Walls
- The Envelope: Roofing, Siding, and Attic Ventilation
- Inside the Home: Electrical, Plumbing, and HVAC Systems
- Home Inspection vs Appraisal Explained: Know the Difference
- Key Questions to Ask Home Inspector After the Walkthrough
- Frequently Asked Questions
Last Updated: September 9, 2026
Why a Home Inspection Checklist Matters in 2026
A home inspection checklist is the single most effective tool a buyer can use to protect their investment in 2026. This guide from Full Disclosure Property Inspection walks you through the critical areas that deserve your attention, from the foundation to the roofline, helping you make an informed decision rather than an emotional one.
A comprehensive inspection identifies unknown property issues that could cost thousands to repair after closing, giving you leverage for negotiation and a clear picture of the property’s true condition. Below, we show you how to evaluate each major system, what questions to ask, and how to use your findings before finalizing the purchase.
A home inspection is a visual, non-invasive examination of a property’s physical structure and major systems, conducted to identify potential problems before the sale is completed. The process typically covers everything from the roof down to the foundation, providing a snapshot of the home’s current condition.
How Long Does a Home Inspection Take? What to Expect
Most home inspections take two to three hours on site, depending on the property’s size, age, and condition. Plan to attend at least the final 30 minutes so the inspector can walk you through their initial findings in person.
- Typical duration: 2-3 hours for a standard single-family home
- New construction: Often faster, but still requires a full walkthrough for quality assurance
- Larger or older homes: Expect up to 4 hours for a thorough evaluation
You do not need to follow the inspector into every crawl space, but be present for the summary. If you have specific concerns about a home inspection checklist item, mention it before the walkthrough begins.
The Exterior: Grounds, Grading, and Drainage
Start your evaluation outside, because water management determines the lifespan of nearly every other component. Proper grading and drainage should direct water away from the foundation, not toward it. Look for downspout extensions that carry water several feet from the house and soil that slopes away from the exterior walls.
Cracks, gaps, or rotting wood on the siding can allow moisture intrusion, leading to structural damage over time. Check for peeling paint, which signals trapped moisture, and note any areas where vegetation touches the house.
A common mistake is overlooking the grading after a rainstorm. If you can schedule a visit shortly after heavy weather, check for standing water near the foundation or pooling in the yard. Poor drainage is a leading cause of basement leaks and foundation cracks, and it is not always visible on a dry day.
The Core: Foundation, Structure, and Load-Bearing Walls
The foundation is the most expensive item on any home inspection checklist to repair. A thorough inspector examines foundation walls and floors for cracks, especially horizontal or stair-step patterns. Minor hairline cracks are often cosmetic, but wider gaps require a structural engineer’s evaluation.
Load-bearing walls and floors should show no signs of sagging or bounce. Check door frames and windows for sticking, which can indicate shifted framing. In the basement or crawl space, look for water stains, efflorescence, or a musty odor, and test the sump pump if present.
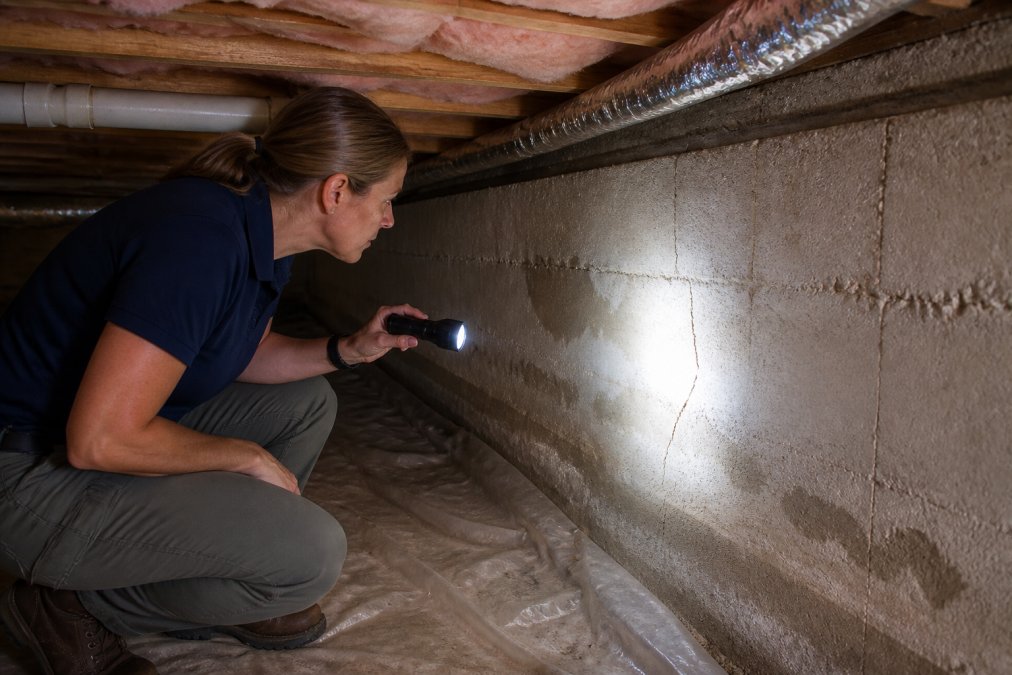
Foundation problems rarely fix themselves. If the inspection reveals significant structural concerns, obtain a quote from a licensed structural engineer before you negotiate repairs. This gives you a concrete number to present to the seller rather than a vague estimate.
The Envelope: Roofing, Siding, and Attic Ventilation
The roof is your first defense against the elements, and its condition directly affects home inspection checklist priorities. A thorough inspection evaluates the entire roofing system, including flashing, valleys, and penetrations.
Roofing Materials and Lifespan: Asphalt shingles typically last 20 to 25 years, varying by quality and climate. Wood shake roofs require more maintenance and have a higher fire risk. Metal roofs can last 50 years or more. The inspector will note the roof’s apparent age and look for signs of wear, including:
- Curling or buckling shingles: This indicates the shingles are nearing the end of their life and may be susceptible to wind damage.
- Missing or broken shingles: These are obvious entry points for water.
- Granule loss: Excessive granules in the gutters or at the base of downspouts signal that the shingles are deteriorating and losing their protective coating.
- Cracked or deteriorated flashing: Flashing around chimneys, skylights, and roof valleys is a common point of failure. The inspector will check that it is properly sealed and directing water away.
The Chimney and Flue: The chimney is a separate system that requires its own evaluation. The inspector will check the exterior masonry for cracks or spalling (flaking brick) and look at the crown and cap. Inside, they will note the condition of the flue liner if visible. A damaged flue liner is a serious safety hazard, as it can allow carbon monoxide to enter the home. A Level 2 chimney inspection, which includes a video scan of the interior, is often recommended for older homes or if a change in fuel type is planned.
Attic Ventilation and Insulation: Attic ventilation prevents moisture buildup and extends shingle life. In winter, poor ventilation leads to ice dams; in summer, it causes heat buildup that can warp sheathing. The inspector will check for a balanced system of intake vents (soffits) and exhaust vents (ridge or gable ends).
Insulation R-Value: The inspector will measure the depth and type of insulation in the attic floor. The recommended R-value for attics in most of the United States is now R-49 (about 16 to 18 inches of fiberglass or cellulose) (energy.gov). If the insulation is insufficient, it is a straightforward, cost-effective upgrade that will improve comfort and lower energy bills.
Signs of Active Leaks: Look for dark staining on roof sheathing, damp or compressed insulation, and signs of pest infestation such as droppings or chewed wiring.
A common mistake is assuming a new roof means no problems. Even a new roof can have installation defects, such as improperly nailed shingles or inadequate flashing. Always verify the age of the roof and ask for the permit and warranty information if it was recently replaced.
If the roof is nearing the end of its lifespan, do not rely on a patch-and-paint approach. Get a quote from a licensed roofing contractor for a full replacement. This gives you a concrete number to present to the seller during negotiations, rather than a vague estimate of ‘roof is old.’
Inside the Home: Electrical, Plumbing, and HVAC Systems
Electrical panel capacity should match the home’s demands, with grounded outlets and GFCI protection in kitchens, bathrooms, and exteriors. Look for signs of amateur wiring, such as exposed splices or double-tapped breakers, which are safety hazards.
Plumbing checks include water pressure, drain speed, and the age and condition of visible pipes. Run every faucet and flush every toilet. A sewer scope can reveal cracks or blockages in the line to the street. Water heaters typically last 8 to 12 years.
Schedule an Inspection or Request a Proposal →
HVAC efficiency depends on the age of the equipment and its maintenance history. Ask when the HVAC filter was last changed and request the service records. An inspector checks that the system heats and cools properly, that the condensate drain is clear, and that there are no signs of rust or corrosion on the unit. The U.S. Department of Energy’s guidance on home energy audits recommends having these systems serviced annually to maintain efficiency and catch small issues before they become major repairs.
Home Inspection vs Appraisal Explained: Know the Difference
A home inspection vs appraisal explained simply: an inspection evaluates the condition of the property, while an appraisal determines its market value. These are two separate processes with different purposes, and both are important for a successful transaction.
The appraisal is required by your lender to confirm the home is worth the purchase price. It focuses on comparable sales, location, and square footage. The inspection, by contrast, is for your benefit as the buyer. It examines the physical condition and identifies defects.
A home inspection checklist is not a pass-fail test; it is a tool for gathering information. The findings help you decide whether to proceed, request repairs, or renegotiate the price. For example, if the inspection reveals the roof needs replacement, you can ask the seller to either fix it or credit you the cost at closing. This is the practical value of the inspection: it turns unknown risk into a defined negotiation point.
Key Questions to Ask Home Inspector After the Walkthrough
The final walkthrough is your opportunity to turn raw data into leverage. Ask the inspector to prioritize findings by severity, distinguishing between immediate safety hazards, major systems nearing end of life, and minor maintenance items.
- What are the top three issues you found, and which require immediate attention?
- Which of these items would you consider safety hazards versus preventative maintenance?
- Can you estimate the remaining lifespan of the major systems, including the roof, HVAC, and water heater?
- Were there any areas you could not access or fully inspect, and why?
- Which items should I expect to address within the first year of ownership?
The answers to these questions to ask home inspector give you a clear sense of the property’s short-term and long-term needs. The American Society of Home Inspectors’ standards of practice defines what a standard inspection covers, so you know what to expect from the report.
From Findings to Negotiation: A Practical Strategy
Once you have the inspector’s answers, use this framework to categorize findings and decide your next move.
1. Categorize the Findings. Create three lists from the report:
- Safety and Habitability Issues: These are non-negotiable. Examples include carbon monoxide leaks, exposed electrical wiring, active roof leaks, or a failing sewer line. These affect the health and safety of the occupants and must be addressed.
- Major System Failures or End-of-Life Items: These are items that are functional now but are at or past their expected lifespan. Examples include a 25-year-old roof, a 15-year-old HVAC system, or a water heater with significant corrosion. These are not immediate emergencies, but they are known, predictable costs.
- Maintenance and Minor Repairs: These are small items like a dripping faucet, a cracked window pane, or a missing gutter hanger. These are typically not worth negotiating over; they are part of normal homeownership.
2. Estimate the Cost to Remedy. For the first two categories, get a rough estimate from a licensed professional. A ballpark figure is enough to establish a negotiating number and is the single most effective thing you can do to strengthen your position.
3. Choose Your Negotiation Tactic. You have three primary options, and the right one depends on the market and the severity of the issues.
- Request a Credit at Closing: This is often the best approach for major systems. You ask the seller to credit you a portion of the estimated repair cost at closing. This gives you control over the contractor and the quality of the work, and it avoids the risk of the seller hiring the cheapest possible fix. For example, if the roof needs replacement and you get a quote for $12,000, you might ask for a $10,000 credit.
- Request a Specific Repair: This works well for smaller, well-defined issues like a faulty electrical outlet or a plumbing leak. Be specific in your request: ‘Replace the faulty GFCI outlet in the kitchen’ is better than ‘Fix the electrical issues.’
- Request a Price Reduction: If the issues are significant and you are prepared to handle them yourself, you can ask for a reduction in the purchase price. This is a direct negotiation on the home’s value.
4. Prioritize Your Requests. You are unlikely to get everything, so prioritize and be prepared to concede on minor items to win on major ones. Sellers are more likely to address safety issues and major failures than cosmetic items, and a credit at closing is often more attractive because it is a defined, finite cost.
When negotiating repairs after home inspection, focus on issues that affect safety, structural integrity, or major system function. Sellers are more likely to address these than cosmetic items. Request a credit at closing rather than a repair, so you control the quality of the work and the choice of contractor. Always get your estimates in writing before you enter the negotiation.
The inspection is not the end of the process; it is the beginning of the negotiation. By categorizing findings, attaching real costs, and choosing a clear tactic, you transform a list of defects into a strategic plan. This is the difference between a buyer who reacts to a report and a buyer who negotiates with confidence.
Frequently Asked Questions
What is the biggest red flag in a home inspection?
Signs of significant structural movement, such as large or expanding foundation cracks, bowing basement walls, or sagging roof lines, are major red flags. These issues can indicate serious problems with the home’s structural integrity and often lead to costly repairs. While not every crack is critical, a professional should evaluate any evidence of shifting or settling to determine if it threatens the building’s stability.
Should a buyer be present during the home inspection?
Yes, plan to attend the final hour of the inspection. This gives you a chance to walk the property with the inspector, see any issues firsthand, and ask questions about the home’s systems and maintenance. It is also the ideal time to ask about the condition of major systems like the HVAC and water heater, and to clarify anything you may not understand in the written report.
What is the difference between a home inspection and an appraisal?
An appraisal is required by your lender to determine the property’s market value for the loan. A home inspection is for your benefit, to evaluate the property’s condition and identify any defects or safety hazards. The inspector assesses the structural integrity, major systems, and overall safety, while the appraiser focuses on comparable sales to justify the purchase price. You need both, but they serve different purposes.
How do I prepare for a home inspection as a buyer?
Ensure all utilities are on so the inspector can test systems. Clear access to the attic, basement, electrical panel, and water heater. Have your list of questions ready, and plan to attend the final portion of the inspection. If you have specific concerns, such as a sewer scope or environmental hazard testing, arrange those in advance. Your presence and preparation help ensure a thorough evaluation.


