Table of Contents
- Why Most Home Repair Lists Fail
- Step 1: Assess Your Home’s Condition Like an Inspector
- Step 2: Separate Urgent vs Non-Urgent Home Repairs
- Step 3: The Hidden Cost Matrix: What Deferred Maintenance Really Costs
- Step 4: Energy Efficiency Prioritization for Long-Term Savings
- Step 5: Budgeting for Investment Property Maintenance
- Step 6: Phased Renovation Planning That Protects Home Equity
- How Property Inspection for Real Estate Investors Changes the Game
- Frequently Asked Questions
Last Updated: September 12, 2026
Why Most Home Repair Lists Fail
Most home repair lists fail because they rank tasks by how annoying they are, not by what they actually cost you in money, safety, and resale value, which is exactly why knowing how to prioritize home repair items matters. Learning how to prioritize home repair items means sorting by consequence, not by visibility. A stained ceiling that hides an active leak outranks a scuffed door every time.
That mismatch is where budgets go to die. Homeowners knock out the cosmetic items first because they’re satisfying and cheap, then discover the deferred maintenance underneath has quietly compounded. This guide walks through a six-step framework to separate urgent repairs from everything else, built on inspection logic that catches problems before they hit your wallet.
The stakes are real. According to Fannie Mae’s homebuyer and homeowner sentiment research, a large share of homeowners report unexpected repair costs straining their finances. Meanwhile, the U.S. Department of Housing and Urban Development’s guidance on healthy housing ties neglected moisture and structural issues directly to safety and health risks. Below, we’ll show you exactly how to sequence repairs so the expensive problems get handled before the cheap ones get painted over.
Step 1: Assess Your Home’s Condition Like an Inspector
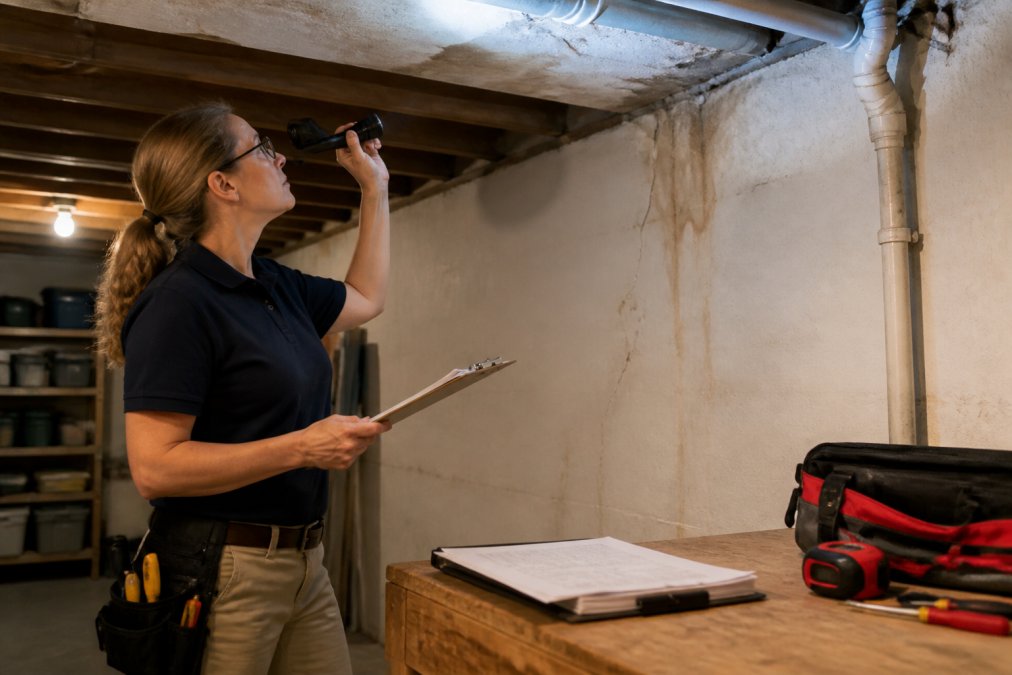
A proper assessment starts with a systematic walkthrough, not a mental list. Grab a clipboard, a flashlight, and your phone camera, then move through the house the way an inspector does: outside first, then top to bottom, then systems.
The Room-by-Room Walkthrough
Work in a fixed order so nothing gets skipped. In each room, check ceilings and walls for water stains, floors for soft spots, and outlets for scorch marks. In the basement and attic, look for moisture control problems: efflorescence on concrete, musty odors, or daylight through the roofline. Outside, examine the building envelope for gaps, cracked siding, and failing flashing.
When to Bring in a Professional
Bring in a professional when you find anything structural, electrical, or hidden behind finished surfaces. Foundation issues, plumbing leaks inside walls, and HVAC efficiency problems rarely announce themselves. At Full Disclosure Property Inspection, our team uses infra-red thermal imaging on every fee-paid inspection, which can surface moisture and heat anomalies a visual walkthrough might miss. If you’re buying or selling, an inspection standard from the International Association of Certified Home Inspectors gives you a baseline for what a thorough report should cover.
Step 2: Separate Urgent vs Non-Urgent Home Repairs
Urgent repairs threaten safety, structure, or cause active damage right now. Everything else waits. The trick is applying that test consistently instead of letting cost or convenience decide for you.
The Four-Tier Priority System
| Tier | What It Covers | Examples | Timeline |
|---|---|---|---|
| 1: Emergency | Safety hazards, active damage | Gas leaks, live electrical faults, burst pipes | Same day |
| 2: Critical | Structural integrity, water damage | Foundation cracks, roof leaks, failing HVAC | Weeks |
| 3: Important | Preventative maintenance | Caulking, gutter cleaning, insulation gaps | This season |
| 4: Cosmetic | Curb appeal, resale value | Paint, fixtures, landscaping | When budget allows |
Skipping Tier 1 and 2 items to fund cosmetic upgrades is the most common mistake homeowners make. A slow plumbing leak behind a wall can rot framing for months before you notice, turning a minor repair into a structural project.
Step 3: The Hidden Cost Matrix: What Deferred Maintenance Really Costs
Deferred maintenance is any repair you postpone, and its cost grows faster than the repair itself. A small roof leak that gets patched early stays a roofing problem. Left alone, it becomes a moisture control problem, then a framing problem, then a mold problem. The repair price barely moves; the damage price compounds.
Most guides stop at “fix it before it gets worse.” That’s useless advice. What matters is mapping each deferred item to the damage it causes over time, then ranking by cost-per-month of delay rather than by sticker price.
How to Build the Matrix
For each open repair, write down four numbers:
- Repair cost now, the contractor estimate or a reasonable range.
- Damage cost if ignored, the realistic worst-case scope if the failure runs another 6-12 months (rot, mold remediation, subfloor replacement, electrical rework).
- Delay multiplier, how fast the damage accelerates. Water and electrical failures accelerate monthly; cosmetic wear accelerates yearly.
- Risk weight, safety and habitability items (gas, live electrical, sewage, structural) get an automatic top rank regardless of dollar figures.
Then divide damage cost by the number of months before the failure typically escalates. That number, dollars of damage per month of delay, is your true priority score. A $400 flashing repair that prevents $6,000 of deck and ceiling damage over 12 months scores roughly $500/month. A $3,000 cosmetic kitchen refresh scores $0/month. The math is not close.
Worked Examples
- Roofing: A missed flashing repair lets water into the deck. Left through one wet season, expect sheathing replacement, insulation replacement, and interior drywall work, often several times the original flashing cost. Delay multiplier: high.
- HVAC efficiency: A neglected filter or low refrigerant charge raises energy bills every month and shortens compressor life. The repair is cheap; the replacement is not. Delay multiplier: moderate but continuous.
- Plumbing leaks: Slow drips corrode framing, soften subfloor, and invite mold. Mold remediation alone can exceed the original plumbing repair by an order of magnitude. Delay multiplier: high once moisture reaches organic material.
- Foundation and drainage: Poor grading erodes soil support and cracks slabs. Foundation work is among the most expensive residential repairs, and it rarely gets cheaper with time. Delay multiplier: high and irreversible.
- Exterior paint and caulking: Cheap to maintain, expensive to defer. Once water reaches siding and trim, you’re replacing material, not repainting it. Delay multiplier: seasonal.
Reading the Matrix
Sort your list by dollars-of-damage-per-month, then break ties in favor of safety. The items at the top are the ones where waiting is actively expensive. The items at the bottom are the ones where waiting is merely inconvenient. That distinction is the entire point of prioritization, and it’s the piece most repair lists skip.
Skipping Tier 1 and 2 items to fund cosmetic upgrades is the most common mistake homeowners make. A slow plumbing leak behind a wall can rot framing for months before you notice, turning a minor repair into a structural project. Run the matrix before you run to the paint store.
Re-run the matrix once a year, or after any major weather event. Delay multipliers change when a roof ages, when a sump pump starts cycling more often, or when a foundation crack widens. A repair that scored low last spring can jump to the top after one hard freeze.
Step 4: Energy Efficiency Prioritization for Long-Term Savings
Energy efficiency upgrades pay you back every month, which makes them a smarter early investment than most cosmetic work. Prioritize the building envelope first: insulation, air sealing, and windows. These reduce the load on your home systems before you spend a dollar on equipment.
After the envelope, look at HVAC efficiency and water heating. A well-sealed attic and properly insulated walls often do more for your energy bills than a new furnace. The U.S. Department of Energy’s home energy efficiency guidance recommends tackling air sealing and insulation before upgrading mechanical systems for exactly this reason. Pair these upgrades with a moisture control check, since tightening a house without managing humidity can create new problems.
Schedule an Inspection or Request a Proposal →
Ask your inspector to flag air infiltration points during a thermal imaging scan. Those images show you exactly where heat is escaping, so you can target sealing work instead of guessing.
Step 5: Budgeting for Investment Property Maintenance
Budgeting for home repairs means planning for them as a fixed operating cost, not a surprise. Whether you live in the house or rent it out, the mechanics are the same: set aside a monthly reserve based on the age and condition of the property, then spend from that reserve in priority order.
How Much to Reserve
A common rule of thumb among property managers is to reserve 1% of the home’s value per year for maintenance and repairs, with older homes and homes in harsh climates trending toward the higher end. On a $350,000 house, that’s roughly $3,500 per year, or about $290 per month. If the roof, HVAC, and water heater are all near end of life, budget above the rule of thumb, those three systems alone can consume several years of reserve in a single season.
Split the reserve into two buckets:
- Reactive fund, for Tier 1 and Tier 2 items from your priority list. This is money you expect to spend.
- Capital reserve, for planned replacements (roof, HVAC, siding, windows). Fund it monthly so a $12,000 roof doesn’t become an emergency loan.
Sequencing Spend Against the Priority List
Spend in this order:
- Safety and structural items from Tier 1 and 2.
- Items with the highest dollars-of-damage-per-month from your Hidden Cost Matrix.
- Energy efficiency upgrades that reduce ongoing operating cost.
- Cosmetic work, last, when the reserve is healthy.
For investors, the calculation adds a return-on-investment lens: every deferred repair is a future vacancy risk, a tenant complaint, and a hit to net operating income. A property inspection for real estate investors should feed directly into your capital improvements plan, not sit in a drawer. When you’re evaluating an acquisition, treat the inspection report as a cost-benefit analysis: which repairs are mandatory to make the property rentable, and which can be phased over the first 24 months?
Tracking and Adjusting
- Track contractor estimates against your reserve to spot underfunding early. If two bids come in above your monthly accrual, raise the accrual, not the credit card limit.
- Schedule preventative maintenance on a calendar, not on failure. Gutters in fall, HVAC service in spring, roof inspection before storm season.
- Revisit the reserve after any major repair. A single foundation fix can reset your baseline for years.
A reserve is not savings, it’s an operating expense you pay yourself. Homeowners who treat it that way stop being surprised by repairs and start choosing when to make them.
Step 6: Phased Renovation Planning That Protects Home Equity
Phased renovation planning means sequencing improvements across months or years so each phase protects home equity rather than eroding it. The order matters: structural and safety-critical work first, then systems, then energy upgrades, then cosmetic finishes.
This phased approach solves the renovation overwhelm problem. Instead of one crushing project, you get a renovation timeline where each phase stands on its own and adds long-term value. A phased plan also keeps your renovation budget flexible, so a surprise foundation issue doesn’t derail everything else.
Phase your projects so that every completed stage increases resale value. Cosmetic work done last looks better and lasts longer when the structure and systems underneath it are already sound.
How Property Inspection for Real Estate Investors Changes the Game
Property inspection for real estate investors turns guesswork into a prioritized repair plan. An independent inspection gives you the structural and mechanical insights you need to sequence repairs, negotiate price, and budget for the first year of ownership.
This is where Full Disclosure Property Inspection fits. Led by Certified Master Inspector Melanie Crabtree, our team brings a general contracting and land development background to every inspection, along with a registered appraiser’s license. We deliver detailed, computer-generated reports that highlight critical areas, so you know what actually matters versus what’s minor. For buyers, sellers, and investors, that independent opinion, protected by a strict Code of Ethics, is the difference between a confident decision and an expensive guess.
Prioritizing home repairs is hard because every item feels urgent when you’re staring at it. The fix is a framework: assess systematically, sort by consequence, and phase the work so each stage protects your investment. Full Disclosure Property Inspection offers infra-red thermal imaging included free on fee-paid inspections, detailed computer-generated reports, and the judgment of a Certified Master Inspector who has performed over 5,000 inspections. Schedule an inspection or request a proposal and get a repair plan you can actually act on.
Frequently Asked Questions
What is the 30% rule for renovations?
The 30% rule suggests capping renovation spending at 30% of your home’s current value. If your home is worth $300,000, you would limit total renovation costs to around $90,000. This guideline helps prevent over-improving a property relative to its neighborhood. For investment properties, the math shifts: focus on renovations that produce a measurable return on investment through higher rents or resale value rather than personal preference.
How do you distinguish between urgent repairs and cosmetic upgrades?
Urgent repairs threaten structural integrity, safety, or cause ongoing damage. Think foundation issues, water damage, plumbing leaks, electrical hazards, and roofing failures. Cosmetic upgrades like outdated paint, worn carpet, or dated fixtures affect appearance only. A professional home inspection identifies which category each issue falls into, giving you an objective basis for sequencing repairs rather than guessing.
What are the most common structural issues found in property inspections?
Common structural findings include foundation cracks and settling, roof deterioration past its expected lifespan, water intrusion around windows and doors, and moisture damage in crawl spaces. Electrical panels that do not meet current code, aging HVAC systems, and plumbing leaks also appear frequently. Thermal imaging during an inspection can reveal hidden moisture behind walls that visual checks miss entirely.
How does a professional inspection report help in prioritizing maintenance?
An inspection report organizes findings by system and severity, so you know exactly which items need immediate attention versus which can wait. It removes guesswork from budgeting for investment property maintenance and gives you documented evidence when negotiating with sellers or contractors. A detailed report also creates a baseline you can revisit each year to track whether deferred maintenance is accumulating.


