Table of Contents
- Why New Construction Inspections Matter More Than You Think
- The Three Phases of New Home Construction Inspection
- Your New Construction Home Inspection Checklist
- Common Defects in New Construction Homes (and How to Spot Them)
- Legal Rights and Builder Pushback: What Buyers Need to Know
- How Inspections Affect Insurance, Resale Value, and Your Wallet
- Frequently Asked Questions
Last Updated: September 11, 2026
Why New Construction Inspections Matter More Than You Think
Do new construction homes need inspections? Yes, and skipping one is one of the most expensive assumptions a buyer can make. A newly built home has passed municipal code inspections, but those checks confirm minimum code compliance at specific stages, not workmanship quality, material quality, or how the building will perform over time (hud.gov). At Full Disclosure Property Inspection, new builds consistently turn up defects municipal inspectors never had the scope to catch.
A certificate of occupancy confirms a house is legally habitable, not that it was built well.
Code inspectors visit at defined intervals, often for a few hours, checking a checklist of minimum standards. They are not testing every outlet, examining every window flashing detail, or running a thermal camera across ceilings. An independent home inspector does exactly that.
The gap between “passed code” and “built correctly” is where your money goes. A missed flashing detail becomes a rotted wall cavity. A poorly graded lot becomes a wet crawlspace. An undersized HVAC return becomes a system that never keeps up in July.
Below: the three phases of new home construction inspection, the defects we find most often, and the contract language that protects your right to inspect.
The Three Phases of New Home Construction Inspection
New construction benefits from three inspection windows, each timed to a stage where problems are still cheap to fix. Miss one and the same defect can cost ten times more later.
| Phase | Timing | Primary Focus | Why It Matters |
|---|---|---|---|
| Pre-drywall | Before insulation and drywall go up | Framing, electrical, plumbing rough-in, HVAC | Systems are visible and correctable |
| Final walk-through | After substantial completion, before closing | Workmanship, finishes, systems operation | Creates your punch list before you take possession |
| 11-month warranty | Around month 11 of your builder warranty | Settlement, cracking, moisture, system performance | Filed while coverage is still active |
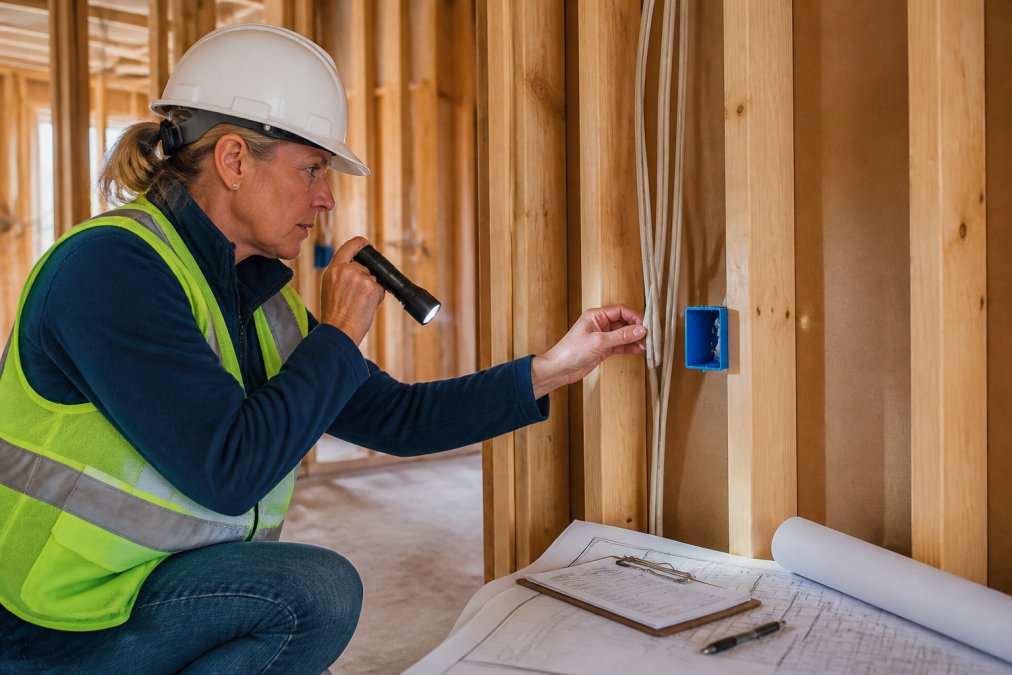
Phase 1: Pre-Drywall Inspection
The pre-drywall inspection is the single most valuable inspection you can schedule on a new build. Once drywall goes up, the framing, wiring, and plumbing rough-in disappear, and diagnosing a problem means cutting into finished surfaces.
At this stage, an inspector verifies framing integrity, wiring security and routing, plumbing rough-in slope and support, and HVAC layout. Thermal imaging reveals insulation and air-sealing gaps before they are sealed out of sight.
Phase 2: Final Walk-Through Inspection
The final walk-through inspection happens after the builder declares the home substantially complete and before you sign closing documents. This is where you build the punch list.
An inspector checks workmanship across finishes, tests every outlet and fixture, operates the HVAC system, runs appliances, checks grading and drainage, and looks for cosmetic and functional defects. Anything on the punch list becomes a documented request for the builder to correct before or shortly after closing.
Phase 3: 11-Month Warranty Inspection
The 11-month warranty inspection lands just before your builder warranty expires, typically around month eleven of a twelve-month period (nahb.org). Settlement cracks, roof issues, moisture intrusion, and system performance problems often surface in the first year, and this inspection documents them while the builder is still obligated to address them.
Most builders will not remind you this window exists. Put it on your calendar the day you close.
Your New Construction Home Inspection Checklist
A new construction home inspection checklist lets you walk the property alongside your inspector and understand what is being evaluated. Here is the core list we work through.
- Foundation: cracks, settlement, moisture intrusion, vapor barrier integrity
- Structural framing: alignment, bracing, notching, connection hardware
- Roof: shingles, flashing, vents, gutter attachment, attic ventilation
- Exterior: siding, trim, caulking, grading and drainage away from the foundation
- Windows and doors: operation, sealing, flashing, glass condition
- Electrical: panel labeling, GFCI protection, outlet polarity, grounding
- Plumbing: supply lines, drains, fixture operation, water heater installation
- HVAC system: sizing, ductwork, airflow, condensate management
- Insulation and building envelope: coverage, gaps, air sealing
- Interior finishes: drywall, flooring, cabinetry, paint, trim
- Safety hazards: handrails, smoke and carbon monoxide detectors, egress
Schedule the pre-drywall inspection before the builder installs insulation. Once batts or spray foam go in, you lose visual access to the wiring and plumbing rough-in, and the inspection becomes far less useful.
Common Defects in New Construction Homes (and How to Spot Them)
Common defects in new construction homes cluster around a handful of categories, most tracing back to subcontractor oversight or scheduling pressure. Here is what we find most often and how to spot each one.
Poor grading and drainage. Water pooling near the foundation is the most common issue we document. Look for soil sloping toward the house, downspouts discharging too close to the foundation, and low spots that hold water after rain.
Incomplete or compressed insulation. Gaps around electrical boxes, recessed lights, and rim joists let conditioned air escape. Thermal imaging makes these gaps visible as temperature differences on the wall surface.
HVAC imbalance. Rooms that never reach the thermostat setting usually point to undersized returns, disconnected attic ductwork, or a system never balanced after installation.
Roof and flashing defects. Missing kick-out flashing, improperly lapped shingles, and unsealed penetrations let water into the building envelope. These often stay hidden until a ceiling stain appears.
Electrical issues. Reversed polarity, missing GFCI protection in wet areas, unlabeled panels, and loose connections are routine findings in new builds.
Cosmetic and workmanship defects. Uneven drywall seams, cracked tile, misaligned trim, and doors that do not latch correctly. Individually minor, collectively they signal how carefully the home was finished.
Do not accept “it passed inspection” as an answer to a specific defect you have documented. Municipal code compliance and workmanship quality are separate standards, and a passing code inspection does not resolve a functional defect you can demonstrate.
Legal Rights and Builder Pushback: What Buyers Need to Know
Most articles answer the “should I inspect” question and stop. The harder question is whether you can, and that answer lives in your purchase contract, not the building code. Here is the contract language to negotiate, the statutory backdrop that gives findings teeth, and a practical escalation path when a builder pushes back.
Schedule an Inspection or Request a Proposal →
The clause that decides everything
Your inspection rights come from the purchase agreement. Builder-drafted contracts vary widely, and the language that matters usually sits in one of three places:
- Inspection contingency. A defined window (commonly 3-10 days after a milestone such as pre-drywall or substantial completion) during which you may hire an independent inspector and deliver written findings.
- Cure or repair obligation. What the builder must do with those findings, repair, credit, or nothing. Some contracts say the builder will correct “defects” but define that term narrowly to exclude cosmetic items and workmanship complaints.
- Inspector approval clause. Language requiring the builder to approve your inspector, or naming the builder’s own affiliate. This is the clause most likely to quietly gut your rights.
Read all three before signing. If the contract is silent on inspections, you generally have no contractual right to demand one mid-build, you rely on the builder’s goodwill and whatever your state’s implied warranty law provides.
What the law gives you regardless of the contract
Even a builder-friendly contract does not erase certain baseline protections:
- Implied warranty of habitability and workmanlike construction. Most states recognize an implied warranty on new homes, though the scope and duration vary. Some states allow builders to disclaim it in writing; others do not.
- State residential construction statutes. Many states have a dedicated chapter governing residential builder obligations, notice-and-opportunity-to-cure procedures, and homeowner remedies. The specific statute, deadlines, and remedies differ by state, so confirm your state’s version before citing it in a dispute.
- Express written warranty. The builder’s own warranty document is a contract. Read the exclusions, they typically carve out cosmetic items, landscaping, and sometimes moisture intrusion.
A documented inspection report converts these abstract rights into a usable claim. Without one, you are arguing about a defect the builder can simply deny exists.
Handling builder pushback: a five-step escalation
Builder resistance is common and usually procedural rather than absolute. Work the steps in order.
- Put the request in writing and cite the clause. Email is fine; a paper trail is the point. Reference the specific section of your purchase agreement that grants inspection access.
- Hire an inspector with no relationship to the builder, the listing agent, or the subcontractors. Independence is the entire value proposition. An inspector who depends on builder referrals for future work is not independent.
- Document every finding with photos, thermal images, and written narrative. A report that says “HVAC imbalance” is arguable. A report that shows a disconnected duct in the attic with a thermal image and a measured temperature differential is not.
- Submit through the builder’s formal process. Use the warranty or punch-list channel the contract specifies. This preserves your notice-and-cure rights under most state statutes.
- Escalate in writing if a legitimate repair is refused. Reference your state’s residential construction statute and the builder’s express warranty. If the amount in controversy is significant, a construction attorney’s demand letter is often the cheapest next step.
Do not let a builder’s superintendent or sales agent talk you out of an inspection verbally. “We already inspected it” and “our warranty covers that” are not the same as an independent third-party report. Get every refusal in writing.
Questions to ask before you sign
- Does the contract give me a defined inspection window at pre-drywall and before closing?
- Can I choose my own inspector, or does the contract require builder approval?
- What is the builder’s repair obligation when my inspector documents a defect?
- What does the express warranty exclude, and how long does each coverage tier last?
- Does my state allow the builder to disclaim the implied warranty of workmanlike construction?
Get answers in writing. A builder who will not put inspection rights in the contract is telling you something about how the build will go.
How Inspections Affect Insurance, Resale Value, and Your Wallet
An inspection report is not just a repair list. It is a dated, third-party record of the home’s condition at a specific point in time, and that record does real financial work long after closing, across insurance, claims, resale, and the cost math.
Insurance: what underwriters actually do with a report
Insurers price risk using the information available to them. On a new build, that information is thin: the home’s age, the builder’s name, and whatever the application discloses. A current inspection report fills the gap.
- Roof condition. Underwriters care about roof age and installation quality more than almost any other single factor. A report documenting proper flashing, correct shingle lapping, and adequate attic ventilation supports a standard-rate policy rather than a surcharged one.
- Electrical and plumbing. Documented panel labeling, GFCI protection, and correct supply-line materials reduce the chance the insurer flags the home for a follow-up inspection or a coverage exclusion.
- Water intrusion history. A report showing dry crawlspace conditions, correct grading, and intact vapor barriers is directly relevant to the water-damage claims insurers dislike most.
- Four-point and wind-mitigation inspections. In many states, insurers request a four-point inspection (roof, electrical, plumbing, HVAC) or a wind-mitigation inspection on homes of a certain age (iii.org). A new-construction report covers much of the same ground and can be submitted in support of a policy application.
A report does not guarantee a lower premium, but it gives the underwriter concrete facts instead of assumptions, usually the difference between a standard policy and a conditional one.
Claims: the report is your evidence file
When you file a claim, the insurer asks when the damage started and what caused it. A phased inspection file answers both with dated documentation.
- A pre-drywall report showing correct flashing installation, followed by a final report showing no moisture intrusion, establishes a baseline. If a ceiling stain appears in year three, you have evidence the defect was not pre-existing.
- An 11-month warranty report documenting a hairline foundation crack gives you a dated record. If that crack widens later, you can show progression rather than a sudden event.
- For builder-warranty disputes, the report is the difference between “the builder says it is normal settlement” and “here is a thermal image and a moisture reading from month eleven.”
Claims supported by a dated inspection history are typically resolved faster, because the causation question is already partly answered.
Resale: turning a maintenance file into negotiating leverage
When you sell, the buyer’s inspector will find whatever is wrong with the home. The only variable is whether you have a paper trail showing you addressed issues proactively.
- Disclosure. Most states require sellers to disclose known material defects. A file of inspection reports and completed repairs lets you disclose accurately and defensibly rather than guessing.
- Negotiation. A buyer who sees a documented repair history, pre-drywall findings corrected, warranty items resolved, has less room to demand a price reduction for “unknown condition.” That file is worth real money at the closing table.
- Appraisal support. Appraisers rely on comparable sales, but documented condition and completed repairs can support the upper end of the range when the home shows well.
The cost math
An inspection is a fixed, modest expense paid once per phase. The problems it catches, foundation repair, roof replacement, mold remediation in a wall cavity, HVAC replacement, run into the thousands and sometimes tens of thousands, and are far cheaper to fix while the builder is still on the hook.
The financial value of a new construction inspection is not the punch list. It is the dated, independent record, the file you hand to an insurer, a claims adjuster, or a buyer’s agent years later when the question is not “is there a problem” but “when did it start and who is responsible.”
A note on documentation
Keep every report, photo, thermal image, and builder response in one folder, digital is fine. When you sell, that folder travels with the home’s history. When you file a claim, it is your first exhibit. When a builder disputes a defect, it ends the argument.
Frequently Asked Questions
Is it necessary to get a home inspection on a new build?
Yes. New construction inspections catch issues that municipal code inspections miss, like poor workmanship, insulation gaps, and grading problems. An independent inspector protects your investment and gives you leverage to request fixes before closing.
Can a builder deny a home inspection?
Builders can refuse access, but most sales contracts include an inspection contingency that allows you to hire a third-party inspector. If a builder denies access, that’s a red flag. Review your contract carefully, and consider negotiating inspection rights before signing. Some builders may push back, but you have the right to protect your purchase.
What are the three phases of a new construction inspection?
The three phases are pre-drywall, final walk-through, and 11-month warranty. The pre-drywall inspection checks framing, electrical, plumbing, and HVAC before insulation. The final walk-through covers finishes and systems. The 11-month inspection identifies issues before the builder’s one-year warranty expires.
What common defects are found in new construction homes?
Common defects include foundation cracks, improper grading and drainage, missing insulation, faulty electrical wiring, plumbing leaks, and HVAC imbalances. Other issues include roof flashing errors, window sealing problems, and incomplete punch list items. An inspector with thermal imaging can detect hidden moisture and insulation gaps that are invisible to the naked eye.


