Table of Contents
- How Infrared Thermal Imaging Works During a Home Inspection
- What Can a Thermal Camera See in a House?
- Top Benefits of Infrared Thermal Imaging for Homebuyers and Sellers
- Best Practices for Thermal Imaging Inspections
- Limitations of Infrared Thermography You Should Know
- How to Read and Act on Thermal Imaging Results
- Frequently Asked Questions
Last Updated: September 10, 2026
How Infrared Thermal Imaging Works During a Home Inspection
Infrared thermal imaging is a non-contact diagnostic method that converts invisible thermal radiation into a visual map of surface temperatures, letting an inspector see problems the naked eye cannot detect. At Full Disclosure Property Inspection, we include this technology free with every fee-paid inspection because it surfaces issues standard visual walkthroughs miss.
The camera doesn’t see through walls. It reads heat. Every material emits infrared energy at a rate determined by its temperature and emissivity, and the camera translates those readings into a color gradient. What matters is the pattern, not the pretty picture.
Thermal Radiation and Emissivity: Why Some Surfaces Read Differently
Emissivity is a material’s ability to emit thermal radiation, measured from 0 to 1. Shiny metal has low emissivity and reflects whatever is nearby, producing misleading readings. Drywall, brick, and wood have high emissivity and report accurately.
This matters because a novice reading a thermal image might flag a “hot spot” that’s actually a reflection off a copper pipe. A trained inspector accounts for the material’s emissivity before drawing conclusions. The ASTM standard guide for infrared thermography outlines how surface properties affect measurement accuracy.
Ask your inspector what the camera’s thermal sensitivity rating is. A camera with a sensitivity of 0.05°C or better resolves the subtle temperature differences that reveal moisture behind drywall. Lower-sensitivity cameras miss small leaks entirely.
What Can a Thermal Camera See in a House?
A thermal imaging camera in a home inspection reveals hidden moisture, electrical hot spots, missing insulation, air leaks, and structural anomalies that produce a measurable temperature difference. It cannot see through solid objects, but it detects the surface temperature changes those problems create.
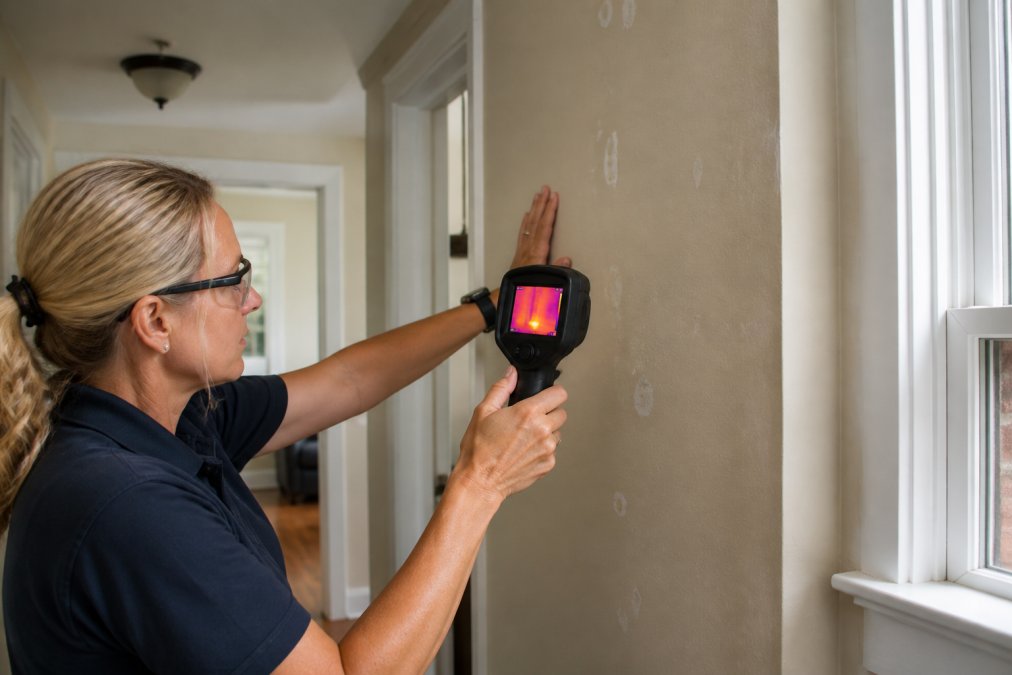
The camera works best with a temperature differential of at least 10°F between inside and outside (energy.gov). On a mild day with no differential, even a good camera struggles.
Hidden Moisture and Water Intrusion
Water changes a material’s thermal mass. A wet patch of drywall or subfloor heats and cools more slowly than surrounding dry material, so it reads as a distinct thermal signature. This is how thermal imaging finds slow leaks, roof intrusion, and plumbing failures before they rot framing or grow mold.
Electrical Hot Spots and Overloaded Circuits
Loose connections and overloaded breakers generate heat before they fail. A thermal scan can show a breaker running warmer than its neighbors, a warning sign of a loose lug or overloaded circuit. This is one of the highest-value uses of thermal imaging because electrical failures are a leading cause of house fires.
A common mistake is scanning a panel before it’s been under load. Run appliances and HVAC first, then scan. A cold panel tells you nothing.
Top Benefits of Infrared Thermal Imaging for Homebuyers and Sellers
The core benefit of infrared thermal imaging in a home inspection is earlier detection of problems that would otherwise stay hidden until they became expensive. For buyers, that means leverage during negotiation; for sellers, fixing issues before they derail a sale.
Here’s how the benefits break down:
- Non-invasive detection. No cutting into walls to find a leak.
- Fast whole-house coverage. An inspector scans every room and the electrical panel in a single visit.
- Objective evidence. Thermal images document findings with timestamps and temperature data.
- Negotiation use. Buyers can request repairs or credits backed by visual proof.
- Pre-listing transparency. Sellers who fix issues upfront avoid surprises during the buyer’s inspection.
Finding Problems Before They Become Expensive Repairs
A slow roof leak caught early might mean a flashing repair. The same leak discovered after a season of saturation can mean rotted sheathing, mold remediation, and interior repairs. Thermal imaging compresses the timeline between “problem starts” and “problem found.”
For sellers, a pre-listing thermal scan is a strategic move. Fixing a $400 moisture issue before listing beats a buyer’s inspector finding it and renegotiating thousands off the price.
Thermal imaging’s real value isn’t the scan itself. It’s catching a problem while the fix is still cheap.
Best Practices for Thermal Imaging Inspections
Best practices for thermal imaging inspections start with conditions: scan when there’s a meaningful temperature differential, ideally 10°F or more between interior and exterior. Summer scans with the AC running and winter scans with heat on produce the clearest results.
Beyond conditions, here’s what separates a competent scan from a careless one:
- Use a camera with thermal sensitivity of 0.05°C or better.
- Scan under load: run HVAC, appliances, and lights before checking the panel.
- Verify every anomaly with a secondary tool like a moisture meter.
- Document ambient temperature, humidity, and time of scan.
- Cross-reference thermal patterns against the home’s construction type.
A common mistake is treating a thermal image as a diagnosis. It’s a screening tool. A bright spot on a ceiling could be a roof leak, a duct leak, or missing insulation. Confirming the cause requires a moisture meter, a visual inspection, or both.
Schedule an Inspection or Request a Proposal →
Limitations of Infrared Thermography You Should Know
Infrared thermography has real limits, and any inspector who doesn’t explain them isn’t being straight with you. It reads surface temperature only, it cannot see inside a sealed wall, measure moisture directly, or confirm a cause without follow-up tools. The limits that actually change a reading are environmental, and most articles skip them.
Emissivity: Why the Same Temperature Reads Differently on Different Surfaces
Emissivity is a material’s efficiency at emitting thermal radiation, expressed from 0 to 1. A surface at 0.95 emits almost all the thermal energy its temperature would predict; one at 0.10 emits very little and reflects the thermal energy of everything around it.
That single number determines whether a reading is trustworthy:
- High-emissivity surfaces, unpainted drywall, brick, concrete, painted wood, most roofing, read close to their true temperature and are reliable for diagnosis.
- Low-emissivity surfaces, bare copper, polished steel, aluminum duct, galvanized flashing, and glass, reflect the camera’s surroundings and can read 20°F or more off from the actual surface temperature.
- The practical fix is to apply a high-emissivity target, such as a piece of matte tape or a dab of flat black paint, to the suspect surface and let it equalize before scanning. Many inspectors carry a roll of electrical tape for exactly this reason.
Reflection: The False Positive That Fools Beginners
A shiny surface doesn’t just read wrong, it can manufacture an anomaly that isn’t there. A copper supply line behind a wall can reflect a warm body or heat source onto an adjacent surface, producing a bright streak that looks like a leak. The tell is the pattern: reflections are sharp-edged, mirror-like, and shift when the camera moves, while real anomalies stay put with soft edges.
Atmospheric Conditions and Distance
Thermal radiation is absorbed by the air between camera and target, and the effect grows with distance and humidity. Water vapor, dust, and carbon dioxide all attenuate the signal. Indoors at 10 to 20 feet the effect is small; for exterior scans at 50 feet or more it becomes significant, and the camera’s atmospheric transmission setting should be adjusted for distance, ambient temperature, and relative humidity.
Wind is the other outdoor variable. A 10 mph breeze can strip heat off a roof faster than the leak beneath can replenish it, erasing the signature. Exterior scans are best on a calm day, ideally early morning or late evening when solar loading has faded and the roof is still releasing stored heat.
Solar Loading and the Time-of-Day Problem
A roof or wall in direct sun for hours stores heat and releases it slowly, which can mask a wet patch or create a false warm area that looks like a leak. Standard practice is to scan exterior surfaces after the sun has moved off them and stored heat has begun to dissipate, typically one to three hours after sunset, depending on construction and weather.
Depth and the Surface-Only Rule
The camera sees the surface. A wet patch behind six inches of insulation may never show on the interior drywall because the insulation buffers the temperature difference. A leak inside a sealed wall cavity may only reveal itself at a seam, a penetration, or a corner where the thermal bridge is shortest. This is why thermal imaging is a screening tool, not a diagnostic one, and why the U.S. Department of Energy guide to thermographic inspections recommends pairing it with blower door testing and other diagnostic methods rather than using it in isolation.
A thermal image showing a cool patch on a wall doesn’t prove there’s moisture. It proves there’s a temperature difference. Without a moisture meter reading to confirm, you’re guessing at the cause, and a guess in a negotiation or a repair decision can cost far more than the scan itself.
What This Means for You as a Buyer or Seller
The limits aren’t a reason to skip thermal imaging, they’re a reason to ask your inspector how they account for them. A qualified inspector will state the ambient conditions, emissivity assumptions, and confirmation method for each finding. If a report shows thermal images with no conditions noted and no follow-up tool mentioned, treat the findings as leads, not conclusions.
How to Read and Act on Thermal Imaging Results
Reading thermal imaging results means understanding that a thermogram is a screening tool, not a verdict. The color gradient shows temperature differences; the inspector’s job is to interpret what those differences mean in context. Most articles stop at “warm is bad, cool is bad” and never explain the reading process, which is why so many homeowners misread their reports.
The Four Things a Trained Inspector Checks Before Trusting an Image
- The temperature scale and span. Every thermogram carries a color bar with a low and high value. If the span is set too wide, a 4°F anomaly washes out into the same color as the wall around it. A competent inspector narrows the span around the suspect area so the pattern becomes visible, then re-widens it to confirm the anomaly is real relative to the rest of the room.
- The reflected apparent temperature. Cameras ask the operator to enter a reflected temperature, essentially, the thermal energy bouncing off the surface from surrounding objects. Get it wrong on a low-emissivity surface and the reading is off by several degrees.
- The emissivity setting. The camera’s emissivity value should match the material being scanned. Drywall, painted wood, and brick sit near 0.90. Bare copper and shiny metal sit far lower and will read as a reflection of whatever is behind the camera, not the metal itself.
- The load and the differential. An electrical reading means nothing if the circuit wasn’t drawing current. A moisture reading means nothing if the wall has been at the same temperature as the room for hours. The inspector should note ambient temperature, indoor humidity, and time of scan so the reading can be reproduced.
A Practical Interpretation Table
| What You See | Likely Cause | How to Confirm |
|---|---|---|
| Cool band along ceiling edge | Missing, compressed, or settled insulation | Visual attic inspection; measure insulation depth |
| Warm spot on a breaker | Loose lug, overloaded circuit, or failing breaker | Licensed electrician torque check and load reading |
| Dark patch on interior wall | Hidden moisture, air leak, or missing insulation | Non-invasive moisture meter; compare to a dry control area |
| Irregular pattern on exterior wall | Settled insulation, framing gap, or thermal bridging | Interior scan of the same wall cavity |
| Bright vertical line on a wall | Stud or framing member conducting heat | Confirm against construction drawings or a stud finder |
| Warm ring around a ceiling penetration | Air leakage at a can light or vent | Blower door test to pressurize the home |
Why a Single Image Is Never Enough
A thermogram is a snapshot of surface temperature at one moment under one set of conditions. Two images of the same wall an hour apart can look completely different as the sun moves or the HVAC cycles. A defensible report pairs each thermal image with ambient conditions, camera settings, and a secondary confirmation, a moisture meter reading, visual check, or load measurement. Without that context, a bright spot is just a bright spot.
When you review a thermal report, look for the temperature scale on each image. If the scale spans 40°F or more, the inspector may have missed a subtle anomaly. A tight scale around the suspect area is a sign the reading was taken seriously.
If you’re buying a newer home, don’t assume thermal imaging is unnecessary. Construction defects like missing insulation batts, improperly sealed penetrations, and disconnected duct runs are common in newer builds and invisible without a thermal scan. The image flags where to look; the follow-up tool confirms what’s there.
Frequently Asked Questions
What are the primary benefits of using infrared thermal imaging during a home inspection?
Thermal imaging reveals problems invisible to the naked eye, including hidden moisture behind walls, missing insulation, electrical hot spots, and air leaks around windows and doors. It is a non-contact, non-destructive method that lets an inspector scan large areas quickly without opening walls. For buyers, this means catching expensive issues before closing; for sellers, it provides a chance to address problems before listing. Full Disclosure Property Inspection includes thermal imaging free with every fee-paid inspection.
How accurate is infrared thermography for identifying insulation gaps?
Infrared thermography is highly accurate for detecting insulation gaps when conditions are right. The inspector needs a temperature difference of at least 10 to 15 degrees Fahrenheit between inside and outside, and must account for emissivity, reflections, and wind. Under proper conditions, thermal imaging can pinpoint missing insulation, compressed batts, and gaps around framing. However, it shows temperature differences, not the insulation material itself, so the inspector confirms findings with a moisture meter or visual check.
What are the limitations of infrared thermography in residential settings?
Thermal imaging cannot see through walls or glass, and it does not measure moisture directly. It reads surface temperature differences, which means low-contrast conditions, reflective surfaces, and strong sunlight can distort results. It also cannot identify the exact cause of a temperature anomaly on its own; an inspector must interpret the pattern and confirm with other tools. For these reasons, thermal imaging works best as part of a comprehensive inspection, not as a standalone test.
Is infrared thermal imaging considered a non-invasive inspection method?
Yes. Infrared thermal imaging is fully non-invasive. The camera captures thermal radiation from surfaces without touching or opening anything. No holes are drilled, no drywall is removed, and no materials are disturbed. This makes it ideal for inspecting finished homes, occupied properties, and areas that are difficult to access. The inspector can scan entire walls, ceilings, and floors in minutes, then follow up with a moisture meter or visual inspection only where the thermal data suggests a problem.


