Table of Contents
- Why New Builds Have Hidden Plumbing Issues
- 1. Check the Water Meter for Unexplained Water Usage
- 2. Signs of a Hidden Plumbing Leak: Stains, Odors, and Sounds
- 3. How to Check Water Pressure in a New Home
- 4. Your New Home Plumbing Checklist for Exposed Pipes and Fixtures
- 5. Plumbing Inspection Before Closing: Professional Testing and Timing
- Builder Warranty, Documentation, and Escalation
- Conclusion: Protect Your New Build Investment
- Frequently Asked Questions
Last Updated: October 9, 2026
Why New Builds Have Hidden Plumbing Issues
A new home should not leak. Yet hidden plumbing issues can occur in new builds regularly.
A hidden plumbing issue is any water problem that produces no obvious sign at the surface. It can sit behind drywall, under a slab, or inside a wall cavity for months.
New builds are prone to this because everything is covered up fast: a crew roughs in the plumbing, drywall closes the walls, and nobody runs a full pressure test in between.
Construction Defects and Installation Errors
Plumbing defects in new construction usually trace back to installation, not materials: a fitting crimped at the wrong angle, a joint soldered cold, a drain line pitched slightly backward so water pools instead of flowing.
These are ordinary mistakes made under time pressure, invisible once the wall is closed.
Most announce themselves early if you know where to look. The five checks below are effective for new builds, and they work whether you hire an inspector or do a careful walkthrough yourself.
1. Check the Water Meter for Unexplained Water Usage
The water meter is the single best tool for catching a hidden leak, and it takes about ten minutes.
If that indicator moves with everything off, water is escaping somewhere, the clearest sign of a hidden plumbing leak you can get without opening a wall.
Watch it for two to three minutes to rule out a toilet quietly refilling. If it keeps moving, log the reading and check again in an hour; a steady creep points to a supply-side leak.
Take a photo of the meter reading before you leave the house for a few hours. If the number has climbed when you return, you have confirmed unexplained water consumption without crawling under anything.
2. Signs of a Hidden Plumbing Leak: Stains, Odors, and Sounds
Your senses catch most hidden leaks before any tool does. The trick is knowing which signals matter and which point to a specific installation error rather than a random failure.
Watch for these signs of a hidden plumbing leak:
- Water stains and discoloration on ceilings, baseboards, or cabinet backs
- Musty smell in a closet, bathroom, or under-sink cabinet
- Mold growth in corners where two walls meet
One stain means little. A stain that grows, or a musty smell that returns after cleaning, points to an active leak.
What Each Symptom Usually Means in a New Build
In an older home, a stain is often just age. In a new build, it usually traces back to one of a handful of construction defects. Matching symptom to cause saves guessing and gives you better language when you call the builder.
- A brown or yellow ring on a ceiling below a bathroom most often means a drain or supply joint that was never fully tightened, or a shower pan set without a proper pre-slope, so water pools and finds the lowest point in the framing.
- A musty smell in a closet that shares a wall with a bathroom usually points to a slow drain leak inside the wall cavity. The smell is the first sign; the stain comes weeks later.
- A dripping sound inside a wall when nothing is running is almost always a supply-line leak, a crimp ring that did not seat, or a nail or screw that nicked a PEX or copper line during drywall or trim installation.
Distinguishing a Leak From Condensation or Exterior Water
Not every damp spot is a plumbing failure, and chasing the wrong source wastes time and damages finishes. Run this quick decision path before you call anyone.
- Dry the area completely. Use a towel and let it air out for an hour.
- Check the weather. If it rained in the last 24 hours, exterior water intrusion, a missing flashing, a poorly sealed penetration, or a grading issue, is a real possibility.
- Check the humidity. Condensation forms on cold pipes in humid air, especially in summer, leaving a wet patch but no stain ring and no smell.
- Re-check in 24 hours. Condensation returns with the weather, a leak on its own schedule, and exterior intrusion with the next rain.
A real leak usually leaves a brown or yellow ring and a musty odor; condensation leaves clear water and no smell; exterior intrusion shows up along a wall, window, or penetration rather than under a fixture.
If you cannot tell the difference, shut off the main water supply overnight. If the damp spot is dry in the morning, you have a plumbing leak. If it is still wet, the source is condensation or exterior water.
When a Symptom Is Worth Escalating Immediately
Some signs are cosmetic. Others mean water is actively damaging the structure. Call the builder the same day if you see any of these:
- A stain that grows over 24 hours
- Water pooling on a floor or in a cabinet
- A musty smell that returns after cleaning
Document each with a dated photo and written note, that record becomes the backbone of a warranty claim if the builder argues the issue is cosmetic or pre-existing.
3. How to Check Water Pressure in a New Home
Learning how to check water pressure in a new home takes one inexpensive gauge and five minutes. In a new build, the numbers can expose installation errors that will not show up as a leak for months.
Screw a pressure gauge onto an outdoor hose bib or laundry sink faucet, turn it on fully, and read the dial.
Then test pressure in two ways:
- Static pressure, with all fixtures off, tells you what the system holds at rest.
- Flowing pressure, with a shower and a sink running at the same time, shows how the system handles demand.
A big drop between the two suggests a restriction or a partly closed valve.
Schedule an Inspection or Request a Proposal →
Check pressure at more than one fixture. A single weak faucet is usually a clogged aerator. Weak pressure everywhere is a system problem worth flagging before closing.
What Pressure Readings Reveal About New-Build Plumbing
In a new build, pressure readings are about installation quality, not comfort. Here is how to read them.
- Static pressure above the normal residential range often means the pressure-reducing valve was never installed, was set too high at the factory, or was bypassed. High static pressure stresses every joint, fitting, and appliance connection in the house. It is one of the most common causes of premature supply-line failures in new construction.
- Static pressure below the normal range can mean a partially closed main valve, a crimped supply line, debris lodged in a fitting during rough-in, or a water meter or service line undersized for the home.
- A large drop between static and flowing pressure points to a restriction somewhere in the system, a partly closed valve, a kinked line, or a fitting that was soldered or crimped incorrectly.
How to Run the Test Correctly
A pressure test is only useful if you control the variables:
- Turn off every fixture in the house. No faucets, no toilets filling, no appliances mid-cycle.
- Attach the gauge to a hose bib or laundry sink faucet. These are usually the least restricted points.
- Open the valve fully and read the static pressure. Record the number.
- Turn on a shower and a sink at the same time. Read the flowing pressure. Record the number.
- Repeat at a second fixture to confirm the reading is not a local issue.
- Log the date, time, and readings. If you escalate to the builder, this log is your evidence.
Do not adjust the pressure-reducing valve yourself on a home still under warranty. That can void coverage for the very defect you are trying to document. Record the reading and call the builder.
When to Call a Professional
A gauge tells you something is wrong, not where. If readings are outside the normal range, or pressure drops sharply when more than one fixture runs, the next step is a professional evaluation.
A licensed plumber can pressure test the main and individual fixtures, check the pressure-reducing valve setting, and use a flow meter to confirm whether the issue is a restriction or a supply problem.
Pressure readings are a screening tool, not a diagnosis. Use them to decide whether to escalate, and document every reading with a date and time.
4. Your New Home Plumbing Checklist for Exposed Pipes and Fixtures
Use this new home plumbing checklist during any walkthrough while pipes and fixtures are still visible.
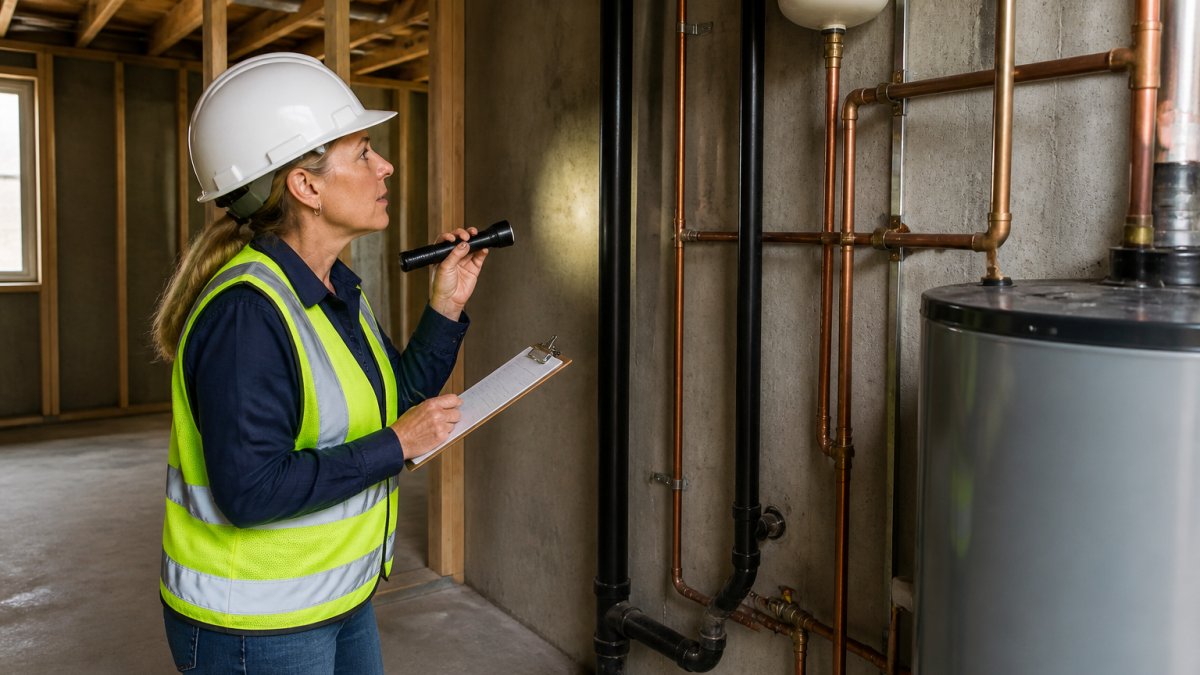
Look for pipe corrosion, green or white crust at joints
- Check for wet insulation around supply lines
- Look for damp concrete or puddles near the water heater
Pay closest attention to the basement and crawl space, where slow leaks collect and damage stays hidden longest.
Do not open a wall or pull a fixture to chase a leak on a home still under warranty. That can void coverage for the very defect you are trying to document. Photograph what you see and call the builder instead.
5. Plumbing Inspection Before Closing: Professional Testing and Timing
A plumbing inspection before closing should happen twice on a new build, not once.
The second is post-handover, once the home has been lived in for a few weeks and slow leaks have had time to show.
Professional testing goes further than a visual walkthrough:
- Acoustic leak detection listens for water moving where it should not
- Thermal imaging shows temperature differences behind walls
- Video pipe inspection looks inside drain lines for blockages and bad joints
At Full Disclosure Property Inspection, we include infra-red thermal imaging with every fee-paid inspection, one of the fastest ways to find a leak a visual check would miss.
If you only get one professional inspection on a new build, book it before closing, while the builder is still responsible for repairs and the paperwork is fresh.
Builder Warranty, Documentation, and Escalation
Your builder warranty is a contract that runs on deadlines.
Document everything in writing:
- Photograph every stain, drip, and meter reading with a date
- Log each call and email to the builder
- Keep your inspection report on file
If the builder stalls, escalate in order: site supervisor, warranty department, then the state licensing board that regulates contractors. A written third-party inspection report carries weight at every step.
For buyers weighing whether to waive an inspection in a competitive market, this is the risk. Waiving it means giving up your best evidence if something goes wrong later.
Conclusion: Protect Your New Build Investment
Plumbing problems in a new build rarely fix themselves, and the longer they sit, the more they cost. The five checks above catch most of them early, while the builder is still on the hook for repairs.
Full Disclosure Property Inspection helps buyers, sellers, and investors across the greater Chattanooga area find these issues before they become expensive surprises.
Schedule an inspection or request a proposal, and protect your new build investment before closing day.
Frequently Asked Questions
What plumbing issues are common in new construction?
New builds often have installation errors that do not show up right away. Common problems include improperly soldered joints, pipes that were not pressure-tested before drywall went up, reversed hot and cold lines, and fittings that were over-tightened and cracked. Construction debris left in drain lines can also cause slow drains or backups. Because these defects sit behind walls and under slabs, they can go unnoticed until water damage appears months after closing.
How can you check for plumbing leaks before closing on a new home?
Start with a water meter test: shut off every fixture and appliance, then watch the meter for 15 to 20 minutes. Any movement means water is moving somewhere it should not. Then look for water stains, discoloration, musty smells, and damp spots near exposed pipes, the water heater, and under sinks. A professional plumbing inspection before closing adds thermal imaging to catch leaks behind finished walls that a visual walkthrough cannot reveal.
How do you check water pressure and drainage in a new home?
Turn on two or three fixtures at once and watch for a noticeable drop in flow. Run each faucet for a full minute and check that drains empty quickly without gurgling. Fill a bathtub and let it drain while watching the toilet and nearby floor drain for backups. If pressure is weak at one fixture but fine elsewhere, the problem is usually a clogged aerator or a kinked supply line. Low pressure everywhere points to a larger supply issue worth flagging.
When should you inspect the plumbing in a newly built home?
The best time is before drywall goes up, when the rough plumbing is still visible and can be pressure-tested. A second inspection after the home is finished catches problems introduced during the final stages, such as damaged fittings or fixtures installed incorrectly. If you only get one chance, schedule a plumbing inspection before closing so any defects can be documented and raised with the builder while your warranty and leverage are strongest.


