Last Updated: November 9, 2026
Quick Summary
To fix minor foundation cracks in a basement, first measure, date, and monitor the crack to confirm it is stable and dry. If it is a dry hairline crack that is not moving, you can seal it with epoxy or a sealant kit, but wet, wide, or moving cracks need a professional evaluation.
- Mark the crack ends with a pencil and date them, then check again in a few months.
- Vertical hairline cracks that stay dry and stable often suit a simple DIY repair.
- Horizontal cracks and stair-step cracks in block walls warrant professional evaluation.
- Epoxy needs a dry surface, so let the crack sit dry for at least 24 hours first.
- Wait the full cure time on the label, often 12 to 24 hours, before finishing.
Table of Contents
- Hairline Cracks Versus Active or Structural Cracks
- Types of Foundation Cracks and What Each One Signals
- Choosing a Repair Method Based on Crack Type and Water Conditions
- Gathering Supplies and Choosing a Basement Foundation Crack Repair Kit
- Step-by-Step: How to Fix Foundation Cracks with Epoxy
- Foundation Crack Repair Cost: DIY Versus Professional Work
- Monitoring the Repair and Deciding When to Call a Professional
- Frequently Asked Questions
Most basement foundation cracks are harmless, but a few signal a problem that no patch will fix. Before you buy a kit for minor foundation cracks, learn to tell the difference. The first step with any minor foundation crack is always the same: measure, watch, and decide.
A basement foundation crack is a break in the poured concrete or block wall that holds up your house. Not every crack is a warning sign. Many form as concrete cures and settles, and they stay small for years.
What to check first:
- Crack width: Hairline cracks are thinner than a credit card edge. Wider cracks deserve a closer look.
- Direction: Vertical and short diagonal cracks are often shrinkage. Horizontal cracks and stair-step cracks in block walls can point to pressure from soil.
- Movement: Mark the ends of the crack with a pencil and date it. Check again in a few months.
- Water: Look for damp spots, efflorescence (a white, chalky residue), or active drips.
Hairline Cracks Versus Active or Structural Cracks
A stable hairline crack stays the same width, shows no offset between the two sides, and stays dry. An active crack keeps growing, one side sits higher or lower than the other, or water flows through it after rain.
Watch out: A crack that is wider at one end than the other, or that is bowed inward, may mean structural movement. Stop, document it with photos and measurements, and call a licensed structural engineer before you do any DIY repair. If you have already found a crack like this during an inspection, the next steps for handling foundation issues explain what to do.
Types of Foundation Cracks and What Each One Signals
Each crack shape tells a different story about what is happening under and around your house.
- Vertical cracks: Usually shrinkage from curing concrete. Often minor if narrow and dry.
- Horizontal cracks: Can mean soil pressure pushing the wall inward. These deserve professional evaluation.
- Diagonal cracks: Commonly caused by settlement. Watch for growth.
- Stair-step cracks: Typical in block walls. Follow the mortar joints and signal possible movement.
The shape of a crack changes the repair plan. A vertical hairline crack suits a simple DIY approach. A horizontal crack almost never does.
Choosing a Repair Method Based on Crack Type and Water Conditions
Match the method to the crack, not the other way around. The right choice depends on three things: whether the crack is dry or leaking, whether it is stable or moving, and whether the wall is poured concrete or block. Use this guide to narrow it down, then confirm against the product label before you buy.
| Crack condition | Likely best approach | Why it fits | When it is unsuitable |
|---|---|---|---|
| Dry, stable hairline (thinner than a credit card edge) | Surface sealant or hydraulic cement | Low cost, quick to apply, blocks air and minor moisture | Active leaks, moving cracks, or cracks wider than the product rating |
| Wet or leaking, stable | Polyurethane injection | Flexible, tolerates moisture, stops water flow | Dry cracks where structural bonding is the goal; wide voids that need filler first |
| Wide, dry, non-moving | Epoxy injection | Restores structural strength and bonds the two sides | Wet surfaces, active leaks, or cracks that are still moving |
| Structural, moving, or displaced | Professional repair | Needs engineer sign-off and possibly wall reinforcement | Any DIY kit, patching will not stop movement |
How to read the table in practice:
- Start with water. If the crack drips or shows dampness after rain, polyurethane is usually the first candidate because it cures in the presence of moisture and stays flexible. Epoxy needs a dry surface to bond, so a wet crack sealed with epoxy often fails along the same line.
- Then check stability. Mark the crack ends with a pencil and date them. If the marks have moved apart after a few months, the crack is active and no injection method will fix the cause. Stop and call a licensed structural engineer.
- Then check wall material. Poured concrete takes injection ports well. Block walls often have hollow cores, so hydraulic cement or surface patching may be more appropriate for cosmetic stair-step cracks, while structural stair-step cracks need professional evaluation.
- Match the product to the crack width. Most injection kits list a target crack width range on the label. A kit made for hairline cracks will not fill a wide void, and a thick patching product will not penetrate a hairline.
Common failure modes to avoid:
- Epoxy over a wet crack: the epoxy lifts or bubbles because it cannot bond to a damp surface. Dry the area with fans or a dehumidifier first, and confirm the crack stays dry for at least 24 hours.
- Polyurethane in a dry structural crack: it seals water but does not restore the strength the wall needs. If the crack is wide and dry, epoxy is the better structural choice.
- Hydraulic cement over an active leak: it can set under pressure, but it is brittle and will crack again if the wall is still moving. Treat it as a water stop, not a structural fix.
- Surface sealant on a moving crack: the sealant stretches and tears, and the crack reappears within a season.
If you are unsure which row your crack falls into, treat it as the more conservative case. A dry hairline crack that turns out to be active is a professional call; a wet crack that turns out to be stable is a polyurethane job.
Gathering Supplies and Choosing a Basement Foundation Crack Repair Kit
Most DIY jobs need only a few basic items: a wire brush, a shop vacuum, a caulk gun, a drill with a masonry bit, mixing buckets, and a putty knife. Buy a kit made for your crack type. Read the label for the material it uses, the crack width it targets, and whether it includes injection ports.
Check the manufacturer’s directions for temperature limits, cure time, and safety gear. Many products need ventilation and gloves, and some are not safe for wet concrete. Verify the product fits your wall material, poured concrete or block.
Step-by-Step: How to Fix Foundation Cracks with Epoxy
Epoxy works best on dry, stable, non-moving cracks. Follow these steps:
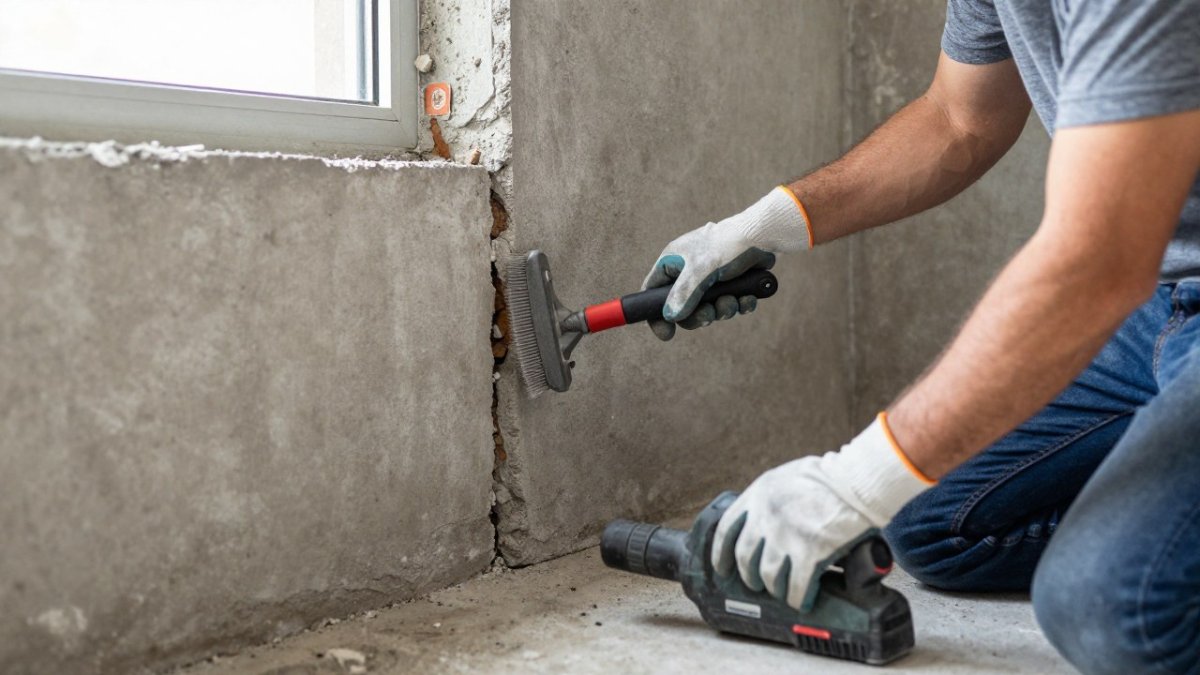
- Clean the crack. Remove loose debris with a wire brush and vacuum. Dust blocks adhesion.
- Dry the surface. Let the crack sit dry for at least 24 hours.
- Install injection ports. Space them along the crack per the kit’s instructions, usually every 6 to 12 inches.
- Seal the surface. Apply epoxy paste over the crack between ports so the injected material stays inside.
- Mix and inject. Mix the two-part epoxy and inject from the lowest port upward.
- Let it cure. Wait the full cure time on the label, often 12 to 24 hours.
- Remove ports and trim. Cut off the ports and smooth the surface.
Real life tip: Work when the room is above the minimum temperature on the label. Cold slows the cure and weakens the bond.
Foundation Crack Repair Cost: DIY Versus Professional Work
Cost is where most homeowners get stuck, because the range is wide and the quotes are hard to compare.
| Approach | Typical cost range | What drives the price |
|---|---|---|
| DIY surface sealant or hydraulic cement | Under $50 in materials | Product type, crack length, whether you already own a caulk gun and wire brush |
| DIY epoxy or polyurethane injection kit | Roughly $50 to $300 | Kit size, number of ports, whether ports and injection gun are included |
| Professional injection repair | Several hundred to a few thousand dollars | Linear feet of crack, access, wall material, whether excavation is needed |
| Professional structural repair |
Pricing depends on crack length, access, method, and wall conditions. Get written quotes and compare the scope of work line by line, including linear feet treated, method used, whether drainage correction is included, and whether a follow-up visit is included.
What warranties actually cover:
- DIY kits: Most manufacturers warrant the product against defects, not against your repair failing. If the crack leaks again because it is active, the warranty typically does not apply. Keep your receipt and the lot number.
- Professional injection: Ask any contractor for the warranty terms in writing, including whether it is transferable if you sell the home.
- Structural repair: Read any warranty’s exclusions carefully before you sign.
How to decide:
- If the crack is dry, stable, hairline, and in an accessible spot, a DIY kit is a reasonable first attempt, and the cost of failure is low.
- If the crack is leaking, wider than a hairline, or has moved since you marked it, professional injection or evaluation is usually the better value because a failed DIY repair costs you the kit plus the professional job.
- If a structural engineer is involved, treat the engineer’s report as the scope of work and get contractor quotes against it, so you are comparing the same job.
Check current product prices at your local hardware store or the manufacturer’s website, and ask contractors for a written scope that names the method, the linear footage, and the warranty terms. For current pricing on Full Disclosure Property Inspection’s services, visit its website or request a proposal.
Monitoring the Repair and Deciding When to Call a Professional
After repair, keep watching. Mark the crack ends and check monthly for the first three months, then every six months. Re-cracking along the same line, new moisture, or a wall that bows inward means the repair did not solve the cause. Stop and call a professional.
A repair that holds is only part of the job. Moisture control, including proper grading and gutter discharge away from the foundation, keeps the crack from returning. If you are buying or selling a home in the Chattanooga area, schedule an inspection before you close. Schedule an Inspection or Request a Proposal with Full Disclosure Property Inspection to get a second opinion from a Certified Master Inspector.
Frequently Asked Questions
Are minor foundation cracks normal?
Many poured concrete foundations develop small hairline cracks as the concrete cures and shrinks, and these are common in basements across the United States. A narrow, vertical hairline crack that is dry, has not widened, and is not offset is usually cosmetic. Cracks that are wider than about one-quarter inch, horizontal, stair-stepped, bowing, or letting in water deserve a closer look. If you are unsure, have a licensed structural engineer or certified home inspector evaluate the wall before deciding on a repair method.
Can you fix foundation cracks yourself?
Yes, many homeowners repair minor, stable, dry cracks themselves using a foundation crack repair kit with epoxy or polyurethane injection, or a hydraulic cement patch for surface cracks. Success depends on correctly identifying the crack, cleaning it thoroughly, following the product label on temperature and cure time, and fixing any water source. Cracks involving structural movement, large offsets, or heavy water intrusion generally require a professional engineer’s evaluation and repair plan.
Should you use epoxy or sealant for a basement foundation crack?
Epoxy injection is designed to restore structural bond across a dry crack, so it is typically used for stable structural cracks that need to regain strength. Polyurethane injection is more flexible and suits cracks that leak water or may move slightly. Surface sealants and hydraulic cement are better for hairline cracks that only need to be sealed against moisture and are not carrying load. Choose the method based on whether the crack is dry or wet and whether you expect continued movement.
How much does it cost to repair a crack in a basement foundation?
Pricing depends on the repair method, the length of the crack, the number of injection ports needed, and whether you buy materials locally or online. Do-it-yourself kits are generally a modest material expense compared with professional work, which usually includes an inspection, injection, and sometimes a written warranty. For current pricing on any repair service, contact a qualified local provider for a written quote. Full Disclosure Property Inspection can provide a quote or inspection proposal for your property.


