Table of Contents
- Pre-Drywall Walk: What to Look For Before the Walls Go Up
- Structural Framing and Load-Bearing Walls
- Electrical Rough-In and Junction Boxes
- Plumbing Rough-In and Drain-Waste-Vent Lines
- HVAC Ductwork, Insulation, and Moisture Barriers
- Windows, Doors, Flashing, and Drainage
- Common New Construction Defects to Watch For
- Questions to Ask Builder During Pre-Drywall Walk
- Frequently Asked Questions
Last Updated: October 4, 2026
Pre-Drywall Walk: What to Look For Before the Walls Go Up
A pre-drywall walk is your one clear chance to see a new home’s bones before drywall hides them for good.
The International Code Council’s building safety resources publishes the model codes most states adopt. Knowing what those codes require gives you real use at the walk.
The pre-drywall walk is your last unobstructed look at the home’s structure and systems. What you miss now gets sealed behind drywall, often for years.
What a Pre-Drywall Walk Is (and Why It Matters)
A pre-drywall walk is a phase inspection performed after framing, rough plumbing, rough electrical, and HVAC installation are complete, but before insulation and drywall are installed.
Most builders schedule their own phase inspections. That is not the same as hiring your own inspector. An independent inspector works only for you.
What to Bring to the Walkthrough
Come prepared and the walk goes faster. Bring:
- A flashlight for dark corners and crawl spaces
- A tape measure to check outlet heights and spacing
- A level to test for plumb and square framing
Wear clothes you do not mind getting dirty. You may be climbing into attic spaces and crouching near subfloor openings.
Photograph every concern from two angles and note the room. Builders respond faster to a clear photo with a location than to a vague verbal description.
Structural Framing and Load-Bearing Walls
Framing is the skeleton of the house. If it is wrong, everything built on top of it suffers. Check that walls are plumb, floors are level, and framing members are straight.
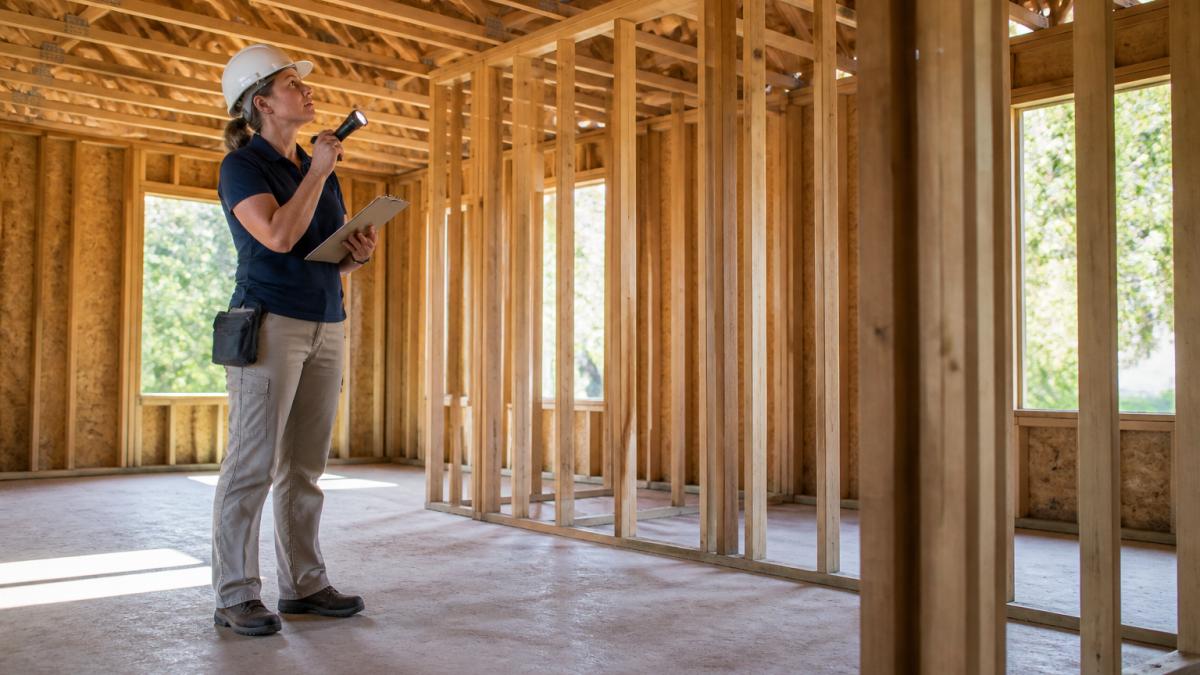
Checking Studs, Joists, and Trusses
Check the wall studs first: straight, evenly spaced, and free of large knots or splits.
Joists should run straight and sit flush; bounce on the subfloor to feel for soft or uneven spots.
Trusses should never be cut, notched, or modified in the field without an engineer’s approval, any cut truss is a red flag.
Fire Blocking and Subfloor Inspection
Fire blocking stops flames from racing through hidden wall cavities. Look for solid wood blocks between studs at floor and ceiling lines.
Check the subfloor for squeaks, gaps, and water stains. Stains mean moisture got in, and the source must be found before drywall seals it away.
Electrical Rough-In and Junction Boxes
Electrical rough-in is the wiring stage before outlets and switches go in, your chance to spot overloaded circuits, missing boxes, and code violations.
Outlet Placement and Circuit Breakers
Walk each room and count outlets, checking spacing and height, especially in kitchens and bathrooms.
Open the main panel: each circuit should be labeled, with no signs of overloaded circuits or missing breakers.
Smart Home Infrastructure to Verify Now
This is where most buyers miss an opportunity. Adding smart home wiring later means cutting into finished walls.
Verify the builder ran conduit for future cable runs, check for ethernet drops in key rooms, confirm doorbell and security camera wiring is in place, and ask where the smart thermostat and hub will connect.
If smart home wiring is not roughed in before drywall, adding it later often means opening walls. Confirm the plan in writing before the walk.
Plumbing Rough-In and Drain-Waste-Vent Lines
Plumbing rough-in covers the supply lines that bring water in and the drain-waste-vent lines that carry waste out and let air in, all visible now.
Supply Lines and Leak Checks
Trace each supply line from the main entry point to every fixture. Look for kinks, sharp bends, and poor support.
Check the drain-waste-vent lines for proper slope. Drains should fall toward the main stack.
Look for moisture around joints, even a slow drip now becomes a mold problem later.
HVAC Ductwork, Insulation, and Moisture Barriers
HVAC and insulation work together to keep the home comfortable and dry. Duct problems and insulation gaps are common new construction defects.
HVAC Registers and Duct Sealing
Check that every room has a supply register and a return path. Look at duct connections for gaps and loose tape.
Duct sealing matters more than most buyers realize. Leaky ducts waste energy and can pull humid air into wall cavities.
Vapor Barrier and Insulation Gaps
The vapor barrier should be continuous, with no tears or gaps, especially at corners, penetrations, and where walls meet the floor.
Schedule an Inspection or Request a Proposal →
Insulation should fill every cavity fully. Gaps around pipes and wires let heat escape and moisture in.
Windows, Doors, Flashing, and Drainage
Water is the number one enemy of any home. Windows, doors, and the drainage plane work together to keep it out.
Window Flashing and Weep Holes
Window flashing directs water away from the opening. Check that flashing is installed above and below each window.
Weep holes at the bottom of windows let trapped water drain out. They should be clear and open, not sealed shut.
Foundation Elevation and Drainage Plane
Check that the foundation sits above the surrounding grade. Water should flow away from the house, not toward it.
The drainage plane on exterior walls should shed water down and out, away from the structure.
Common New Construction Defects to Watch For
Even well-built homes have defects. Knowing what to look for, and why each one matters, helps you separate a cosmetic snag from a problem that will cost you for years.
The Most Frequent Structural Issues Found Before Drywall
The most common defects at this stage:
- Cut or modified trusses without engineering approval. Trusses are engineered as a system. A field cut or notch can compromise the load path. Ask for the stamped engineer’s letter if any truss was altered.
- Missing fire blocking between floors. Fire blocking is solid wood or approved material that stops flames from racing through hidden wall cavities. Check the top and bottom plates of each wall and the floor line between stories.
- Gaps in the vapor barrier and insulation. Even small gaps let conditioned air escape and humid air enter, watch corners, penetrations, and where walls meet the floor.
Red Flags That Signal Bigger Problems
Some issues point to a pattern, not a one-off mistake:
- Multiple cut trusses or modified framing on the same floor
- Water stains on subfloor or framing, moisture got in, and the source needs to be found
- Unlabeled or overloaded electrical circuits in the main panel
If you see a pattern, call for a deeper review before drywall goes up. A single missed item is a punch-list fix; a pattern suggests the crew is rushing or ignoring the plans, worth a second set of eyes.
How to Tell a Cosmetic Issue From a Real One
Not every defect is equal. Use this filter:
- Cosmetic: A scuff on a stud, a small knot in framing lumber, a slightly uneven drywall seam that will be covered. Note it, but do not hold up the build.
- Functional: A drain that slopes wrong, a disconnected duct, an overloaded circuit. These affect how the home works and should be corrected before drywall.
- Structural or safety: A cut truss, missing fire blocking, or improper flashing. These affect the home’s integrity and should be corrected before drywall, with documentation.
When in doubt, photograph it and ask. A builder who dismisses a functional or structural item without explanation is worth watching closely.
A defect list is only useful if it drives action. Photograph it, write it down, and verify the fix before drywall hides the evidence.
Questions to Ask Builder During Pre-Drywall Walk
The walk is not just about what you see, it is about what you ask, how you document the answers, and how you verify the work gets done. The real leverage is the paper trail you build before drywall goes up.
How to Document Findings So They Actually Get Fixed
A verbal concern is easy to forget by the next morning; a written, dated, photographed concern is hard to ignore. Build documentation in three layers:
- Photo log: One wide shot showing the room and one close-up showing the defect. Name the file with the room and date (for example,
primary-bath-drain-slope-100426.jpg). - Written punch list: Number each item, describe the location and defect, and state the correction you expect. Reference the plan sheet or spec where relevant.
- Delivery method: Email the punch list to the site supervisor and the builder’s main office contact. Email creates a timestamp; a text or hallway conversation does not.
Items delivered in writing with photos get resolved faster, because the supervisor can forward the email directly to the trade responsible.
Negotiating Corrections Before Drywall Goes Up
Bring your numbered list and walk it with the site supervisor. For each item, ask three things: who is responsible, what the fix looks like, and by what date.
Ask these questions during your pre-drywall walk:
- Can you confirm all framing changes were engineer-approved, and can I see the stamped letter?
- Where is the fire blocking between floors, and can we look at it together?
- Can you show me the smart home wiring plan and confirm which rooms get ethernet drops?
Get answers in writing. A verbal promise is easy to forget, and a schedule slip is easy to hide once drywall covers the evidence.
Escalation Path If the Builder Pushes Back
Not every builder resists. But when one does, knowing the ladder matters:
- Site supervisor, first stop, and usually the fastest fix for minor items.
- Construction manager or superintendent, escalate here if the supervisor stalls or disputes a code item.
- Builder’s warranty or customer care department, put the concern in writing and reference your purchase agreement’s construction standards.
- Local building department, if an item appears to violate the adopted code, the inspector who signs off on the rough-in has authority. You can request the item be re-examined before the rough-in inspection is approved.
- Third-party inspector’s report, an independent report carries weight because it is not tied to the builder’s schedule.
Keep the tone factual. “The drain line in the hall bath slopes away from the stack, which conflicts with the plan sheet” lands better than “this is wrong.” Builders respond to specifics and documentation, not frustration.
Ask the builder to walk the punch list with you before drywall. Corrections are far cheaper now than after closing, and a signed-off punch list is your proof the work was done.
Verifying Corrections Before Drywall Is Hung
This is the step almost everyone skips. A promise to fix is not a fix. Before drywall goes up, do a short re-walk:
- Bring your original numbered punch list and check each item off.
- Re-photograph each corrected area from the same angle as the original photo.
- Confirm the correction matches what was agreed, not a shortcut.
If an item is still open, do not let drywall proceed on that wall. Once the board is up, your leverage drops sharply. A short delay now is far cheaper than opening a finished wall later.
Do not accept “we will get to it after drywall.” Items behind drywall are the hardest and most expensive to correct. Insist on completion before the board goes up.
Frequently Asked Questions
Is a pre-drywall inspection worth the cost?
Yes. A pre-drywall walk catches framing, electrical, plumbing, and HVAC problems while they are still visible and easy to fix. Once drywall goes up, correcting those same issues means cutting into finished walls, which costs far more. An independent inspector can identify defects the builder’s own quality checks may miss, giving you documented leverage to request corrections before you close. For new construction buyers, this is one of the highest-value inspections you can schedule.
What should I look for regarding electrical and plumbing rough-ins?
Check that electrical junction boxes are secure, properly spaced, and positioned where you want outlets and switches. Verify circuit breakers match the home’s load plan. For plumbing, confirm supply lines are strapped and protected, and that drain-waste-vent pipes slope correctly with no visible leaks. Look for conduit runs for future cable or smart home wiring. If anything looks rushed or misaligned, note it and ask the builder to correct it before insulation and drywall cover the work.
Should I hire a professional inspector for a pre-drywall walk?
A professional inspector brings tools and experience that most buyers lack, including knowledge of building code compliance. Hiring a home inspector for new build projects means you get an independent opinion not tied to the builder’s timeline or bottom line. While you can walk the site yourself, an inspector knows what common new construction defects look like and can document them in a report you can use to negotiate corrections with your builder.
What are the biggest red flags to watch for in new construction?
Watch for cut or notched load-bearing studs, missing fire blocking between floors, improperly sloped drain lines, gaps in the vapor barrier, and window flashing that is missing or installed backward. Foundation elevation problems and poor drainage grading are also serious. Any of these can lead to structural weakness, water intrusion, or costly repairs later. Document each issue with photos and ask your builder for a written correction plan before drywall is installed.


