Last Updated: October 22, 2026
Quick Summary
Builder warranty coverage is a written guarantee from the home builder covering defects in workmanship, materials, and structural components for a set period after closing. The standard 1-2-10 timeline provides one year of broad coverage for all defects, then years two through ten for systems and structural issues, though it excludes normal wear and tear, homeowner neglect, and cosmetic problems.
- Year one covers workmanship and materials like drywall cracks, door problems, flooring defects, and paint issues
- Years two through ten protect major systems and structural elements including electrical, plumbing, HVAC, roofing, and foundations
- Claims typically require written notice within 30 to 60 days of discovery or you may forfeit your right to repairs
- Common exclusions include normal wear and tear, homeowner misuse, maintenance issues, and pre-existing conditions not documented at closing
- Schedule an independent inspection before year one ends to document defects while full workmanship coverage applies
Table of Contents
- What Builder Warranty Coverage Actually Protects
- The 1-2-10 Builder Warranty Timeline Explained
- Builder Warranty Exclusions and What They Mean
- How to File a Builder Warranty Claim: Step-by-Step Process
- Builder Warranty Inspection Checklist for New Homes
- Why Independent Inspection Matters Before Warranty Expiration
- Frequently Asked Questions
What Builder Warranty Coverage Actually Protects
Builder warranty coverage is a written guarantee from the home builder covering defects in workmanship, materials, and structural components for a set period after closing.
Many homebuyers assume builder warranty coverage protects everything. It doesn’t, it has clear limits, exclusions, and time windows.
Builder warranty coverage typically addresses three categories of defects:
- Workmanship issues (framing problems, installation errors, finish work)
- Material defects (structural components that fail prematurely)
- System failures (HVAC, plumbing, electrical that don’t perform to code)
The key is that builder warranty coverage protects against defects that exist at closing or appear during the warranty period, not normal wear and tear or homeowner neglect.
Get a pre-closing walkthrough with a professional inspector. Many defects are easier to document and address before you take ownership than after closing.
The 1-2-10 Builder Warranty Timeline Explained
The standard 1-2-10 builder warranty timeline breaks protection into three periods. Specifics vary by builder and state regulations.
Year One: Workmanship and Materials
Year one covers the broadest range of defects, the builder must fix workmanship problems and material failures, including:
- Drywall cracks and finish issues
- Door and window operation problems
- Flooring defects
The one-year window is your strongest period for claims, builders expect punch-list items and minor repairs. Many require written notice within 30 to 60 days of discovery; missing that deadline can forfeit your right to repairs.
Years Two Through Ten: Systems and Structural Components
Years two through ten cover major systems and structural elements, protecting against failures in:
- Electrical systems and wiring
- Plumbing systems and pipes
- HVAC systems and ductwork
Coverage in years two through ten is narrower: typically defects affecting safety, soundness, or habitability, not cosmetic issues. Structural defects, load-bearing components, foundations, and major framing, can be claimed through year ten, including water intrusion that damages structural elements.
The 1-2-10 timeline gives you one strong year for all defects, then eight years of protection for systems and structural issues. Plan your inspections and claims accordingly.
Builder Warranty Exclusions and What They Mean
Every builder warranty has exclusions. Understanding how exclusions are written is what lets you challenge a denial that misapplies them.
Common exclusions include:
- Normal wear and tear (carpet fading, paint aging, caulk shrinking)
- Damage from homeowner misuse or neglect
- Maintenance issues (clogged gutters, dirty HVAC filters)
How to Read an Exclusion Clause Like a Claims Adjuster
Wording determines whether a denial holds up. Look for four patterns:
- Named exclusions. Specific items listed by name (for example, “cracks in concrete slabs less than 1/4 inch”), measure and document against the stated threshold.
- Catch-all phrases. Terms like “normal wear and tear,” “cosmetic,” or “failure to maintain” are intentionally broad. A denial citing only a catch-all is the most challengeable, because the builder must connect your specific defect to the phrase.
- Performance standards. Some warranties define a defect by a measurable outcome, a door that doesn’t latch, a floor that deflects more than a stated amount, water that intrudes. If your symptom meets the standard, the “minor” exclusion shouldn’t apply.
- Maintenance carve-outs. Many warranties exclude damage from failure to perform listed maintenance. If the warranty doesn’t specify a maintenance schedule, the builder has a weaker basis for blaming you.
A broad “cosmetic” exclusion can swallow real functional defects, uneven flooring, misaligned doors, or gaps that let water in. If a denial leans on “cosmetic,” ask the builder to explain in writing how the defect fails to affect function, safety, or habitability.
How to Dispute a Warranty Denial
Step 1: Request the denial in writing with the specific clause cited.
A phone denial isn’t challengeable.
Step 2: Rebut the clause with evidence.
Match your documentation to the clause.
Step 3: Request an independent evaluation.
Ask in writing for a second inspection by someone not on the builder’s payroll.
Step 4: Use the warranty’s own dispute procedure.
Some builders participate in third-party arbitration or a warranty-standards program; others require mediation before litigation.
Send every dispute communication by a method that creates proof of delivery, and reference the original claim date and the builder’s written denial. A clean paper trail is often what moves a denied claim to an approved repair.
The Exclusion That Trips Up Most Buyers
The most common disputed exclusion is the pre-existing condition clause: if a defect existed at closing but wasn’t documented in the final walkthrough, the builder may treat it as outside warranty coverage. A professional inspection before closing, with a written report, converts a disputed “pre-existing” claim into a documented condition with a date attached. The second most common is the maintenance carve-out, keep receipts and service records for HVAC filters, gutters, caulking, and any other item your warranty names.
How to File a Builder Warranty Claim: Step-by-Step Process
Filing a builder warranty claim requires documentation, timing, and clear communication, the deadlines below decide whether a claim survives.
Before You File: Map the Defect to the Right Coverage Tier
Most claims fail not because the defect isn’t real, but because it’s filed under the wrong coverage period or described in a way the builder can reject. Use this mapping to frame your claim correctly.
| Symptom you observe | Likely coverage tier | Evidence to collect | First move |
|---|---|---|---|
| Hairline drywall cracks, nail pops, sticking doors, paint or trim defects | Year-one workmanship and materials | Dated photos, measurements, list of affected rooms | Submit written notice within the warranty’s notice window |
| Plumbing leak, electrical fault, HVAC failure, roof leak | Years two through ten systems coverage (confirm your warranty’s schedule) | Photos, service records, contractor diagnosis, dates the system stopped working | Notify in writing and request inspection |
| Foundation movement, cracked slab, bowing wall, roof framing deflection | Structural coverage (often the longest tier) | Inspector report with cause-and-origin opinion, crack monitoring photos over time | Request independent evaluation before the structural deadline |
| Water intrusion damaging framing or finishes | Often structural or systems, depending on cause | Moisture readings, thermal images, photos of staining and swelling | Document the source and the damage separately |
| Appliance or fixture malfunction | Manufacturer warranty, not builder warranty | Model and serial numbers, purchase date, manufacturer paperwork | Contact the manufacturer’s warranty line first |
Describe the defect by its effect, not just its appearance. “The bedroom door will not latch and the frame is out of square” is a habitability and workmanship claim; “the door looks crooked” invites a cosmetic denial.
Schedule an Inspection or Request a Proposal →
The Claim-Submission Checklist
Work through this list for every claim. Keep a copy in your home file.
- Confirm the defect is inside an active coverage period and note the expiration date
- Re-read the notice requirement: how notice must be given, to whom, and by when
- Photograph and video the defect from multiple angles, with a date reference in the frame
Step-by-Step: From Notice to Resolution
Step 2: Review your warranty documents. Note the reporting deadline (often 30-60 days from discovery), required notification method, who to contact, and any required forms.
Step 4: Attend the inspection. The builder will typically schedule an inspection to assess the claim.
Step 5: Get the decision in writing. The builder will approve or deny your claim. Request a written explanation.
Deadlines are the most common reason valid claims fail. Workmanship windows are short, and notice requirements often run from the date you discovered the defect, not the date you got around to reporting it. Put every warranty expiration date and notice deadline on your calendar the day you close.
Pre-Deadline Walkthrough Planning
Schedule a walkthrough before each coverage tier expires, not after. A practical schedule:
- Month 10-11 (before the year-one workmanship window closes): Full interior and exterior walkthrough with photos, focusing on drywall, doors, windows, flooring, tile, and trim. Submit any remaining punch-list items in writing before the deadline.
- Month 22-23 (before the systems window narrows): Inspect HVAC, plumbing, and electrical with a licensed professional. Document performance, not just appearance.
- Year 9-10 (before structural coverage ends): Independent inspection focused on foundation, framing, roof structure, and water intrusion. This is the last window for the longest-tier claims.
A claim is only as strong as its paper trail. Map the defect to the right tier, follow the notice procedure exactly, and get every decision in writing. The checklist above is the difference between a claim that gets repaired and one that gets denied on a technicality.
Builder Warranty Inspection Checklist for New Homes
A structured inspection before closing protects your warranty rights. Use this checklist to document the home’s condition at closing.
Exterior Elements
- Roof for missing, cracked, or improperly installed shingles
- Gutters and downspouts for proper attachment and function
- Siding, brick, or stucco for cracks, gaps, or improper installation
Interior Structure
- Walls and ceilings for cracks, nail pops, or uneven surfaces
- Floors for gaps, squeaks, or uneven sections
- Doors and windows for smooth operation and proper latching
Mechanical Systems
- HVAC system operation (heating and cooling function)
- Thermostat calibration and response
- Water heater for proper installation and function
Finishes and Details
- Paint coverage and quality (no drips, thin spots, or missed areas)
- Tile, grout, and caulking for proper installation and gaps
- Cabinet doors and drawers for alignment and operation
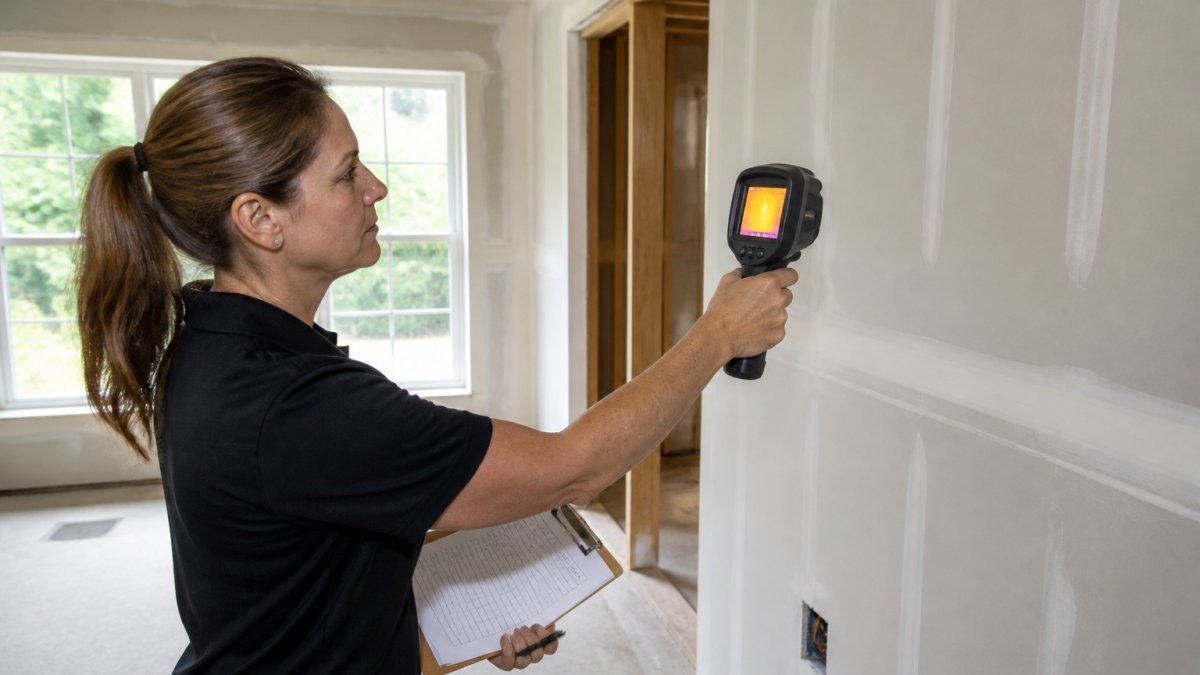
Take photos of everything you inspect, note any defects or concerns, and share the list with the builder to request repairs before closing.
Why Independent Inspection Matters Before Warranty Expiration
An independent professional inspection before your warranty expires protects your interests.
An independent inspection can:
- Identify defects you might miss on your own
- Provide expert documentation that supports your claims
- Use advanced tools like thermal imaging to find hidden problems
Full Disclosure Property Inspection offers comprehensive inspections with thermal imaging included, documenting defects thoroughly for warranty claims.
Schedule an independent inspection during your first year of ownership, while full workmanship coverage applies. This gives you the strongest position for any claims you need to file.
Builder warranty coverage protects your investment in new construction, but only if you understand what’s covered and act within the required timelines.
When you’re buying new construction, don’t assume the builder’s warranty is sufficient. Get an independent professional assessment.
Frequently Asked Questions
What does a typical builder warranty cover?
A typical builder warranty covers three tiers: workmanship and materials defects in year one, major systems (plumbing, electrical, HVAC) in years two through ten, and structural components like foundation and load-bearing walls for the full ten-year period. Coverage includes defects in workmanship, defective materials, and failures that prevent the home from performing to building code standards. However, normal wear and tear, maintenance issues, and damage from homeowner misuse are excluded.
What voids or limits builder warranty coverage?
Builder warranty exclusions typically include damage from natural disasters, homeowner negligence, lack of maintenance, alterations made by the owner, and normal settling. Most warranties exclude cosmetic issues like paint finish variations and minor cracks. Many builders also exclude coverage if you fail to report defects within specified timeframes, often 30 to 60 days of discovery. Reading your warranty document carefully and documenting defects promptly is essential to avoid losing coverage due to late reporting.
How long does a builder warranty last and what is the 1-2-10 timeline?
The 1-2-10 builder warranty is the industry standard: one year for all workmanship and materials, two years for major systems like plumbing and electrical, and ten years for structural components such as foundation and roof. This tiered structure means you have different coverage windows depending on the defect type. Year one offers the broadest coverage, while years two through ten focus on systems and structural integrity. After ten years, builder warranty coverage typically expires entirely.
How should I report a problem under my builder’s warranty?
Report defects in writing to your builder as soon as you discover them, do not wait. Send a written notice (email or certified mail) documenting the defect, its location, photos if possible, and the date discovered. Include the specific coverage period it falls under (year one, two, or ten). Keep copies of all correspondence. Most builders require notice within 30 to 60 days of discovery; missing this deadline can void your claim. Review your warranty document for the exact reporting procedure and contact information before problems arise.


